AeroElectric Connection
|
Bob's Shop Notes: |
|
Bob's Shop Notes: |
| Click Here for Larger Image
 |
It seems that the 'Connection website was recently found lacking in depth of
detail for explaining the simple-ideas upon which the reliable and economical
application of solderless terminals are based. Having acquired some new
toys for peering ever closer at visual manifestations of these simple ideas,
I went off to the workbench and assembled the following article that will trade
off the significance of differences between an El-Cheapo and Hi-Dollar tool
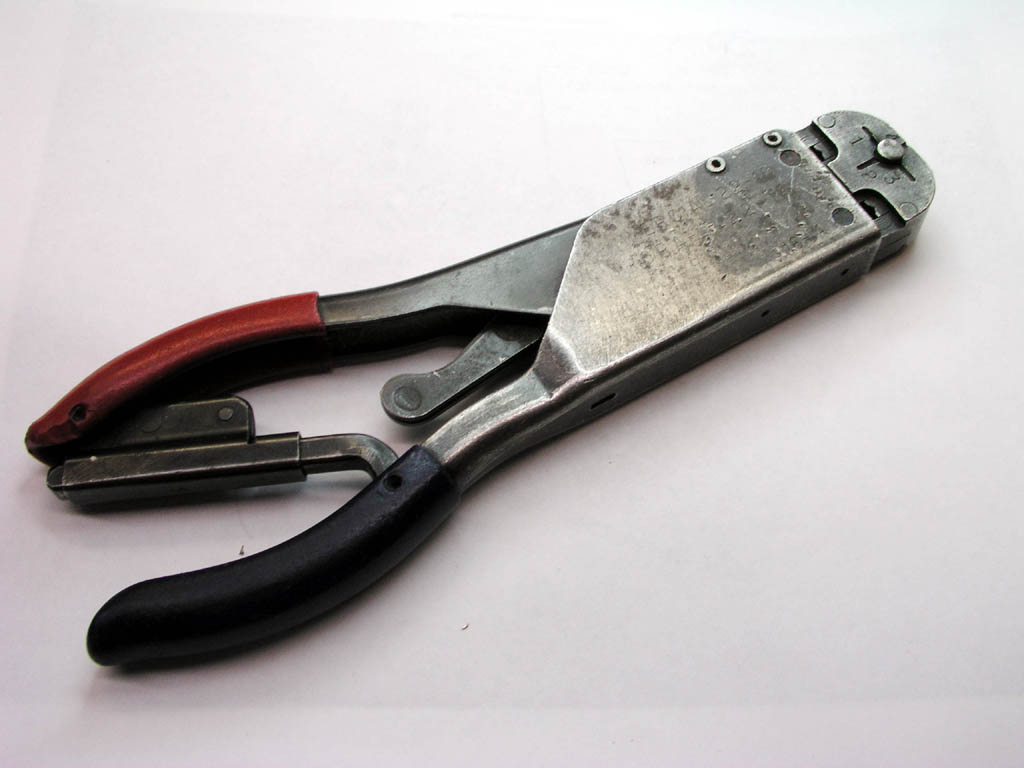
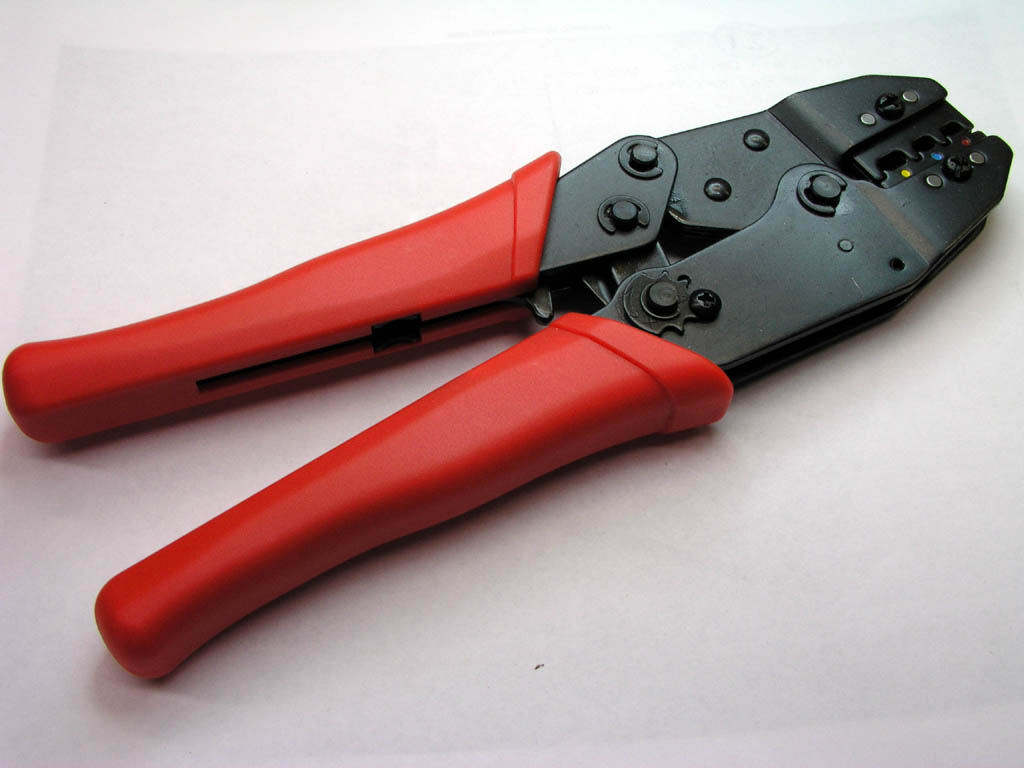
for the installation of top-of-the-line terminals on wires. The tool pictured on the left is an Asian knockoff of a family of relatively low cost tools made in the US for terminal installation. It has ratchet controlled handles that force the tool to be cycled through a full stroke against hard stops so that uniformity of crimp height is guaranteed. This tool sells from B&C's website catalog for about $40. The tool pictured on the right is the Amp "t-head" tool for red (16-22AWG) and blue (14-16AWG) terminals. I purchased this tool at Cessna salvage about 1965 for $20 as I recall. I sent it back to AMP for refurbishment at a cost of $75. At that time, I think the tool sold new for about $150. Today, it's about $600.
|
Click Here for Larger Image.
|
| Click Here for Larger Image
 |
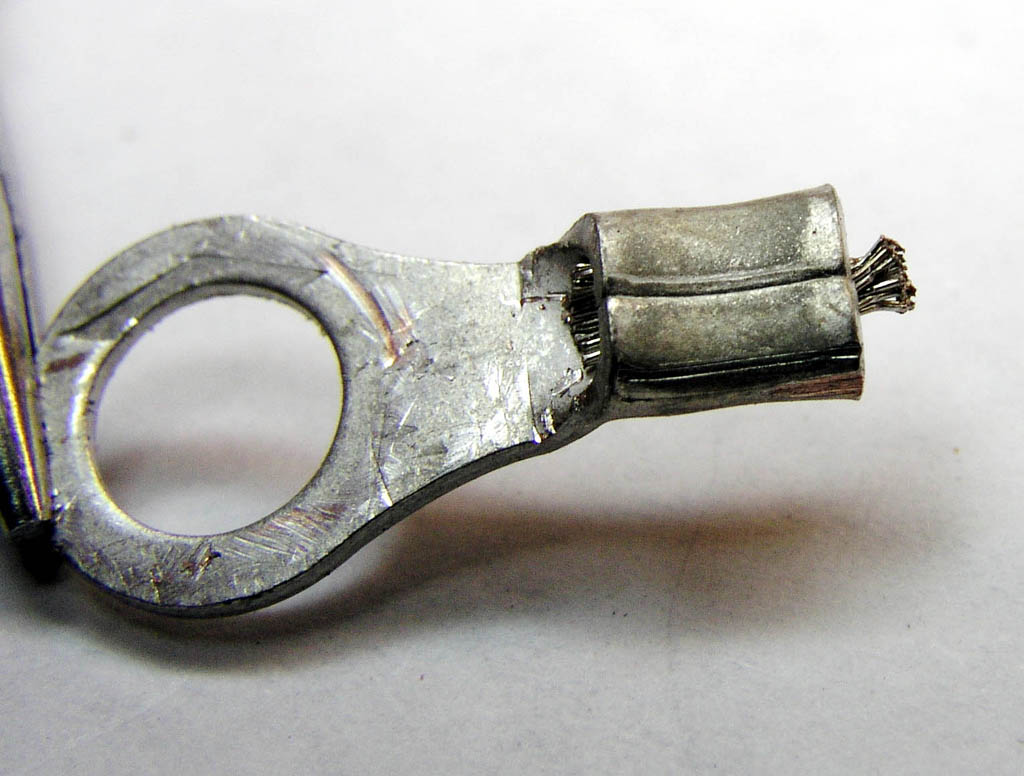
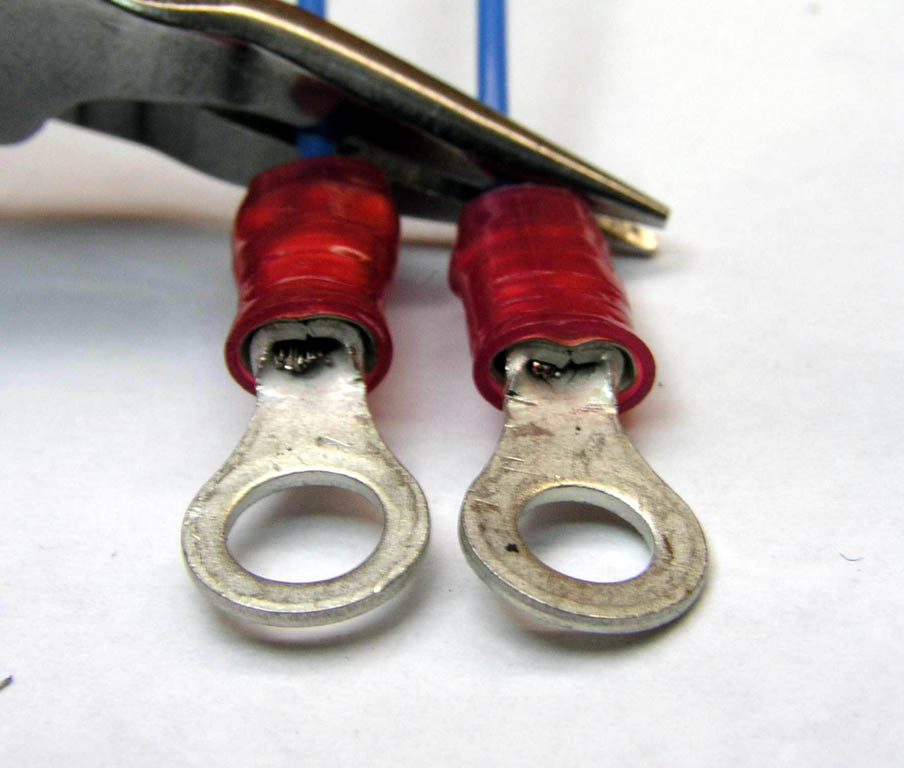
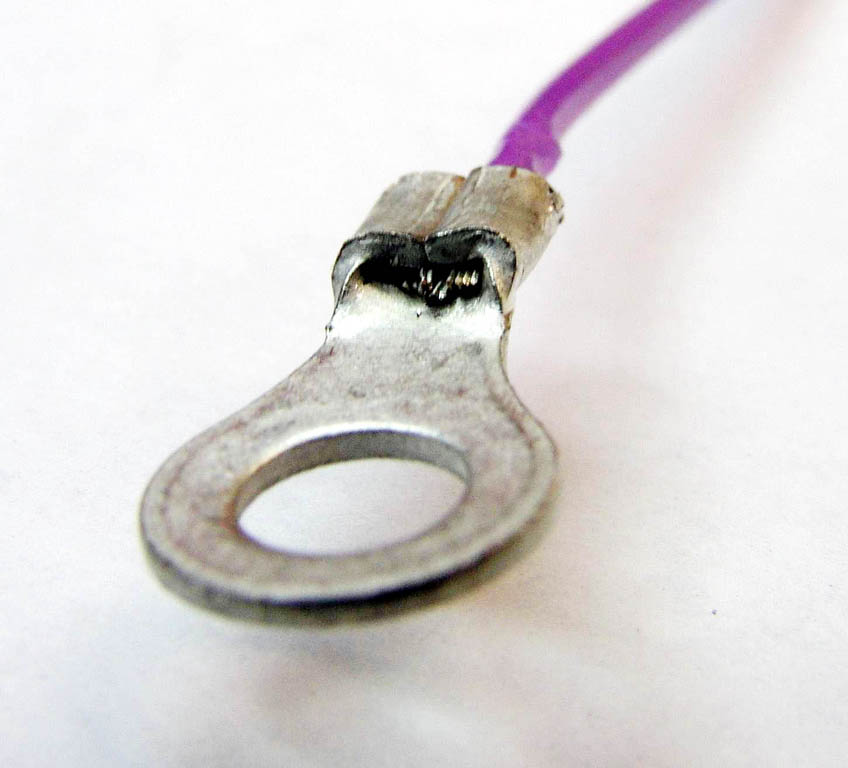
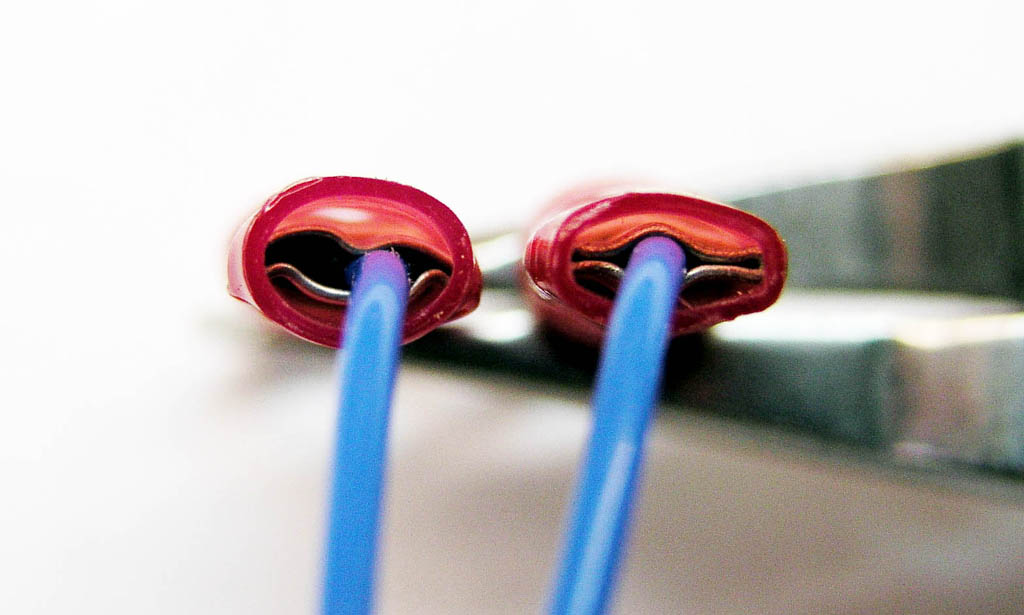
Let's begin with a couple of red PIDG terminals attached to a piece
of 22AWG wire using the two tools described above. The terminal on the
left was installed with the El-Cheapo tool. Note that the Hi-Dollar tool produces a more sculptured appearance to the crimp. The El-Cheapo dies are shaped in a uniform, squashed cylinder. The Hi-Dollar dies are more artistically shaped by folks who have made a lifetime career in wire termination technology. No doubt there are benefits to be realized from the extra effort but let us compare the final results . . . |
| Click Here for Larger Image
 |
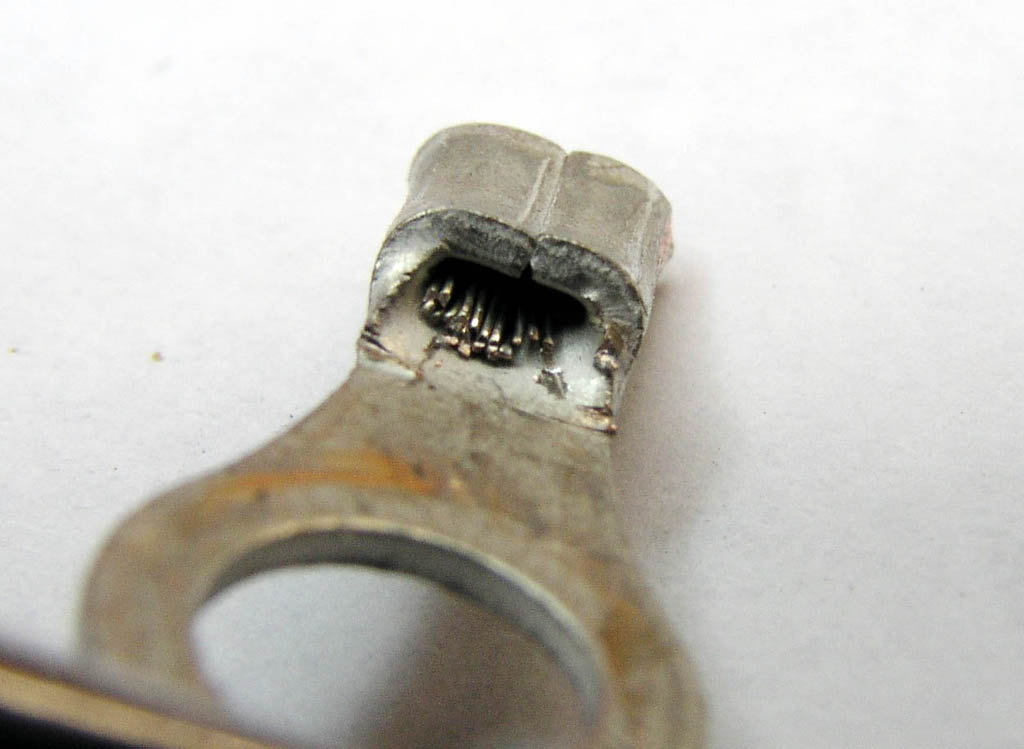
Here we see that the wire strands were properly positioned in the terminal before crimping. Tips of the strands are just flush with the end of the wire-grip barrel . . . |
| Click Here for Larger Image
 |
To explore the electrical connection, we need to peel away the insulation grip barrel. Here we can see the "wasp-waist" crimp produced by the Hi-Dollar tool as compared to the uniform cylinder appearance of the El-Cheapo. | Click Here for Larger Image.
|
| Click Here for Larger Image
 |
Note the bell-shaped wire-entrance for the Hi-Dollar crimp. The resulting level of craftsmanship in artful sculpture of the Hi-Dollar dies is obvious. | Click Here for Larger Image.
|
| Click Here for Larger Image
 |
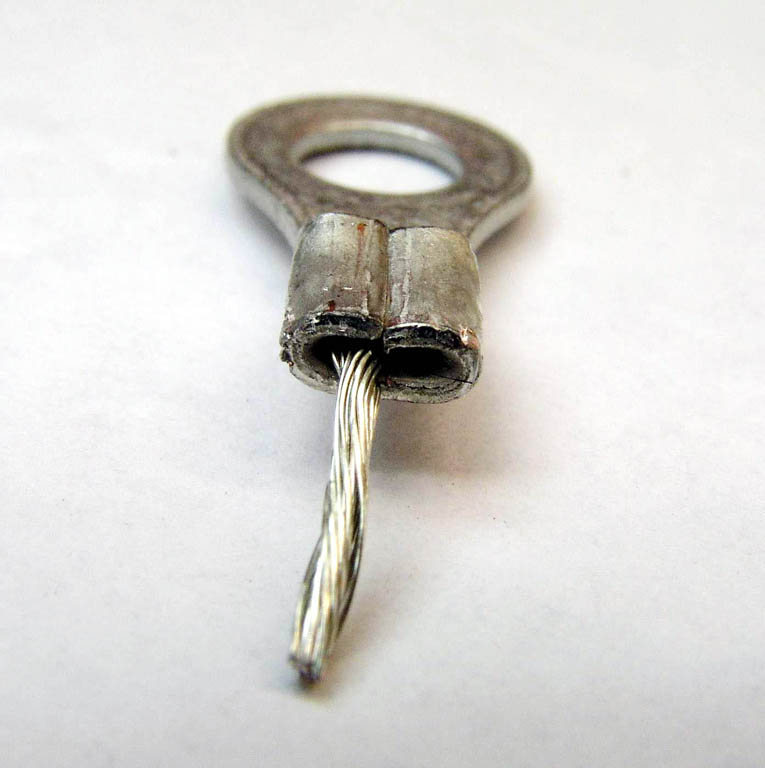
Looking into the free end we note that tips of stripped wire strands
are visible and are NOT constrained. They exit the wire grip area
free to wave around in the breeze . . .
|
Click Here for Larger Image.
|
| Click Here for Larger Image
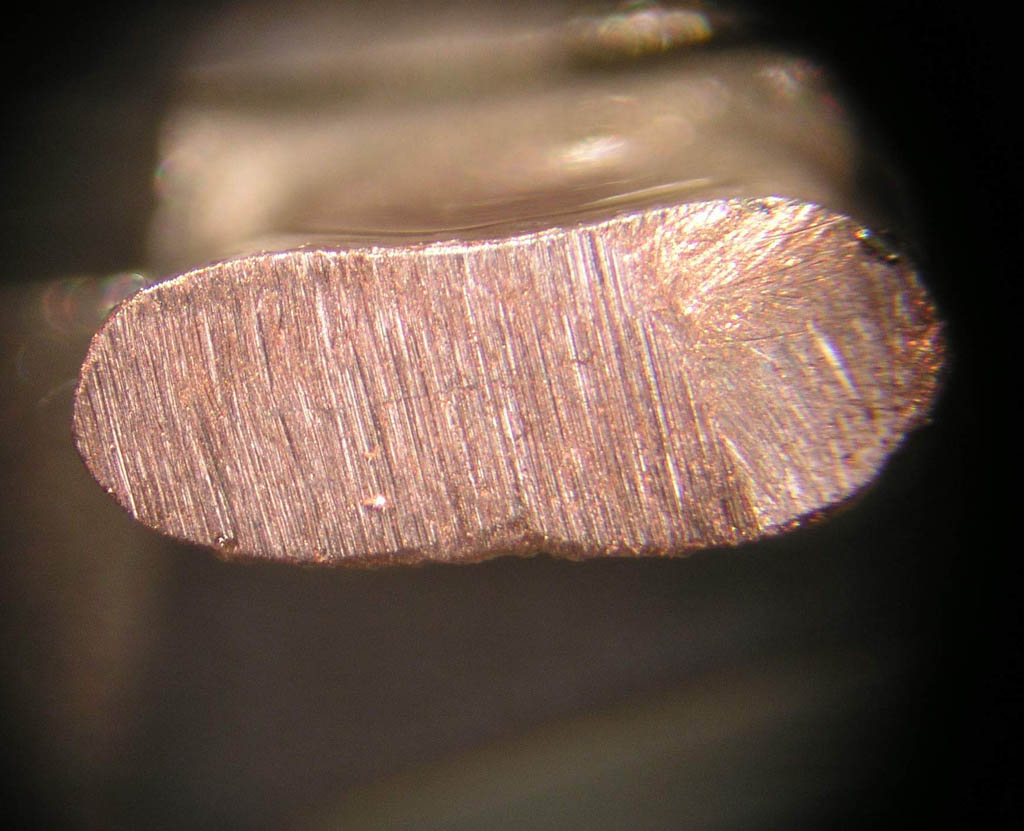 |
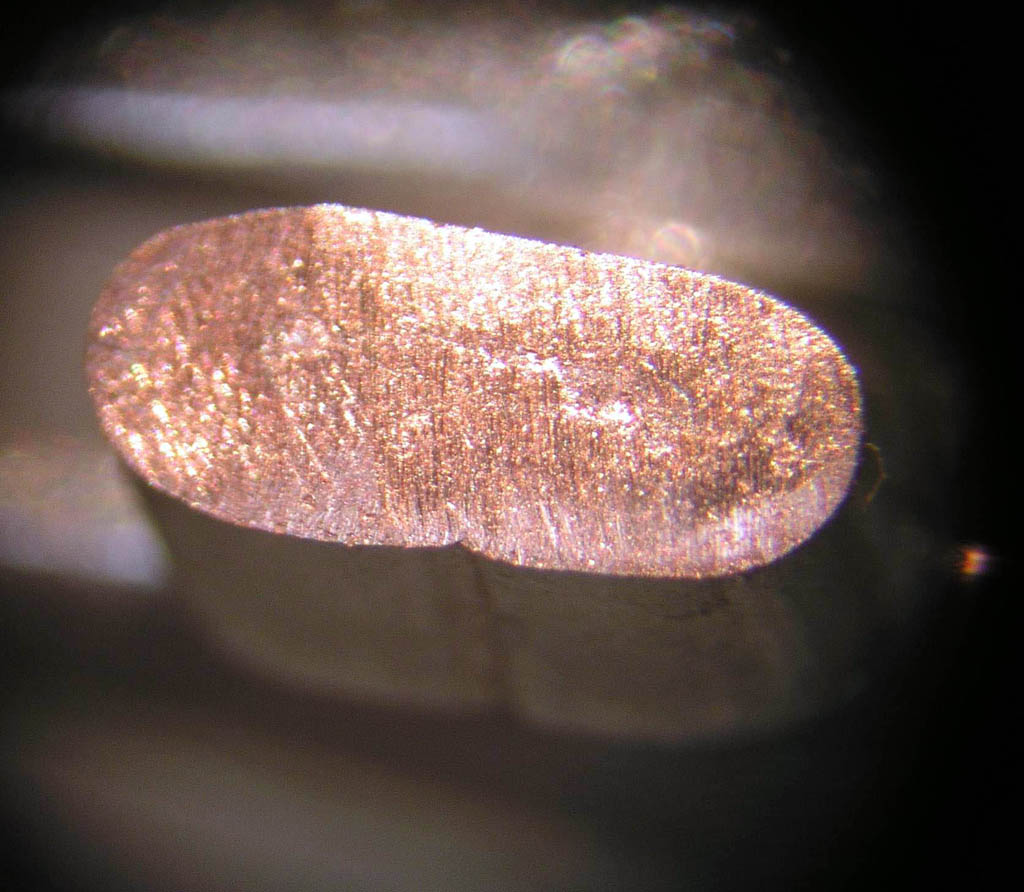
Here's where the "rubber hits the road" (or wire hits the terminal).
I cut the two terminals through the wiregrip center and polished the
ends as best I could with tools available here. The scratches you see
here are from the grit size of a synthetic ruby hone I use to renew the
edge on X-Acto knife blades. Even this fine abrasive is pretty coarse
for the task at hand . . . but I think the idea is clear. Note that there are no voids in the wire grip area for either terminal. If I had a better polishing tool, you would be able to see individual strands captured in the terminal wire grip barrel. The 500 microinch or so thickness of tin plating on each strand would be visible as squashed ovals traced in the copper surface. I'll try to get some terminals properly polished and replace these photos with some that show this level of detail. Bottom line is that both tools produce volume within the finished crimp that has become a single solid mass with no voids. |
Click Here for Larger Image.
|
| Click Here for Larger Image
 |
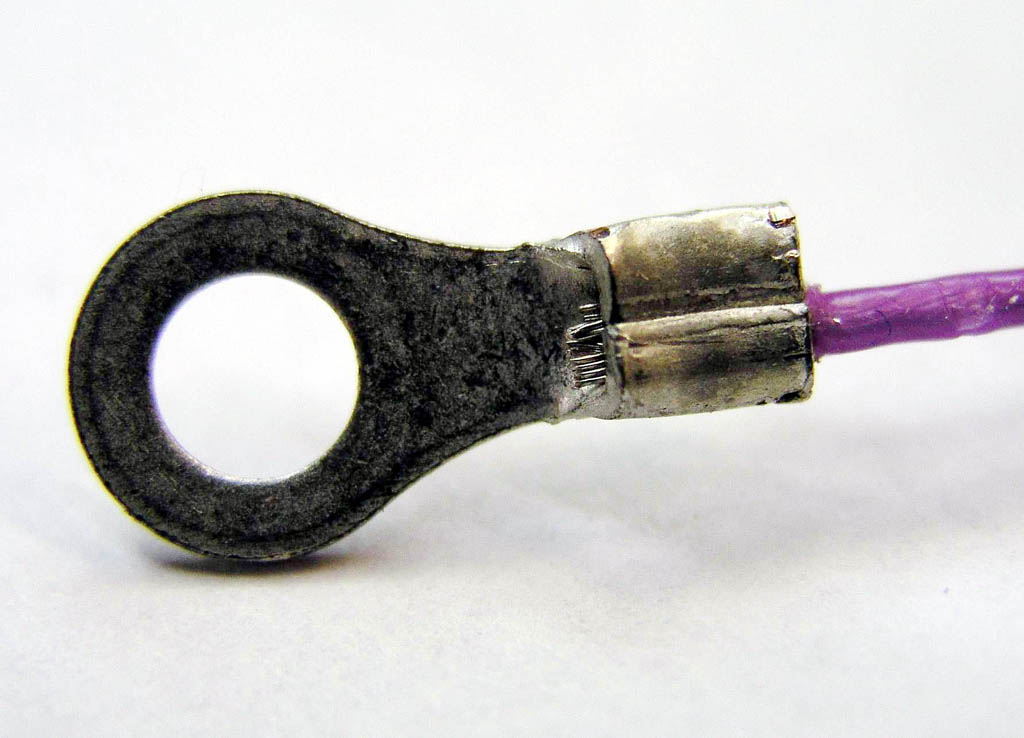
Let's shift our attention to the other end of the terminal.
We can see striking difference in how the tools close the
insulation grip. In fact, I believe the term "diamond grip"
used in Amp's trade name for their terminals and tools comes from
the very neat closure of metal down around the wire. Note that
the nylon outer jacket on both crimps could NOT be depended upon
for insulation support. Okay, the crimp on the left is UGLY . . . but is it functional? |
| Click Here for Larger Image
 |
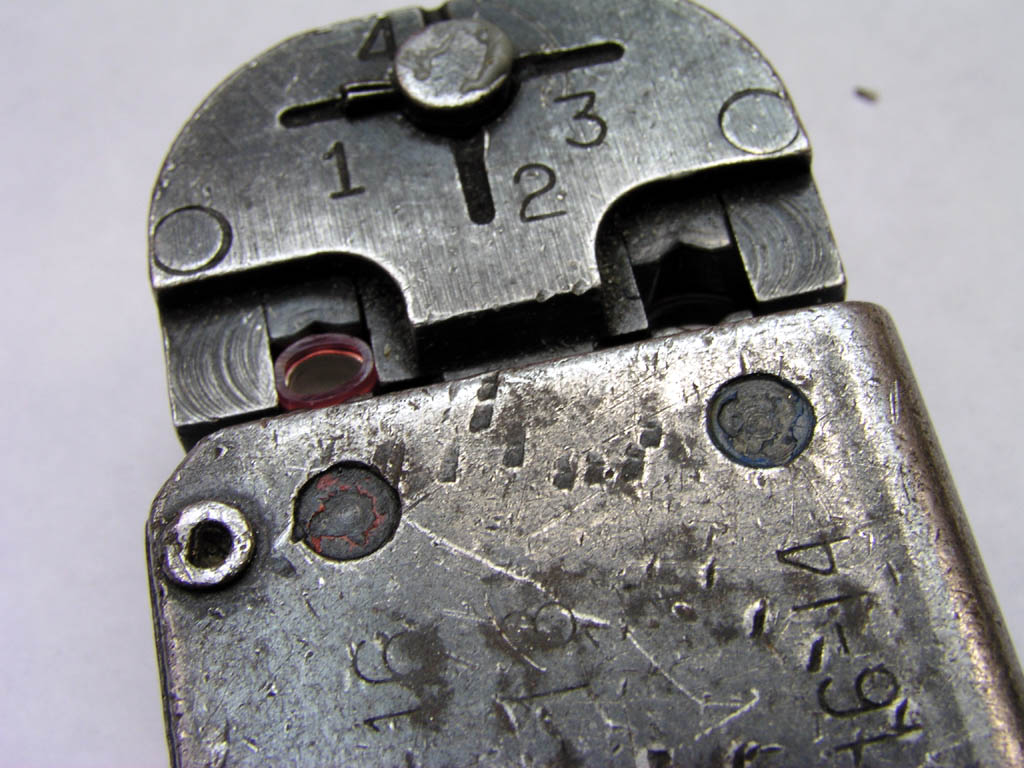
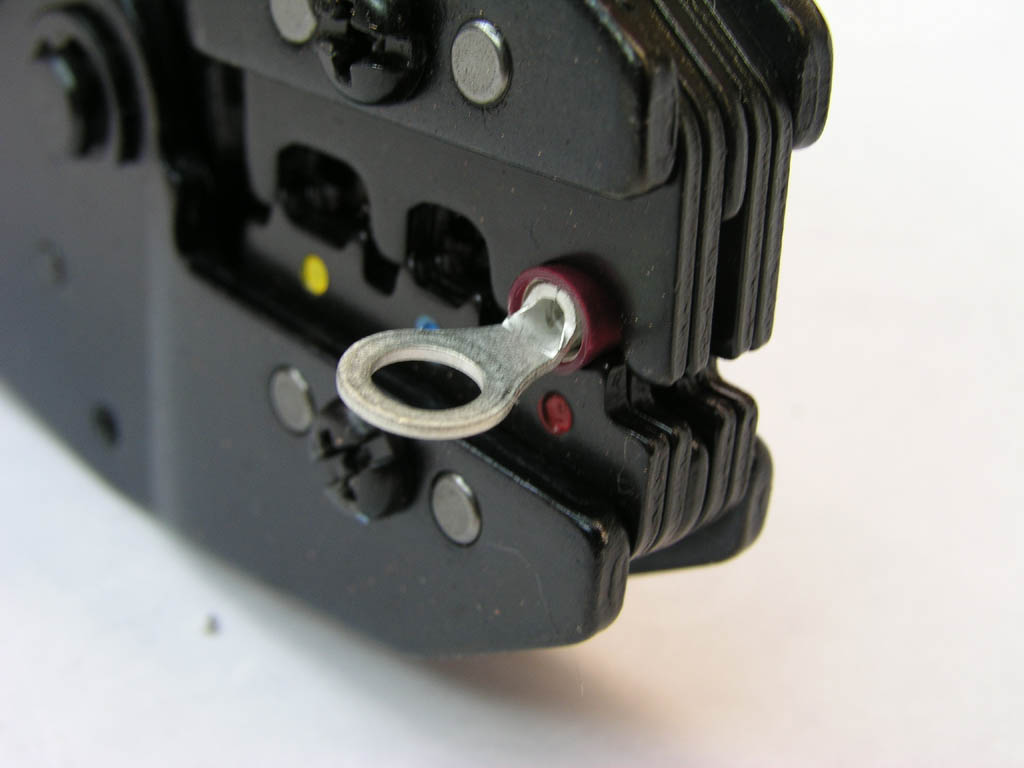
Here's the business end of the two tools. Note the adjustable
cam that sets the die height for the insulation grip on the Hi-Dollar
tool. If I were putting multiple wires into a single terminal, I can
open up the insulation grip to accommodate the larger cross-section
of wires. This adjustment has NO EFFECT on height of the wire grip. The El-Cheapo dies are the same for both grips and symetrical such that it matters not which way the terminal is inserted into the tool. |
Click Here for Larger Image.
|
| Click Here for Larger Image
 |
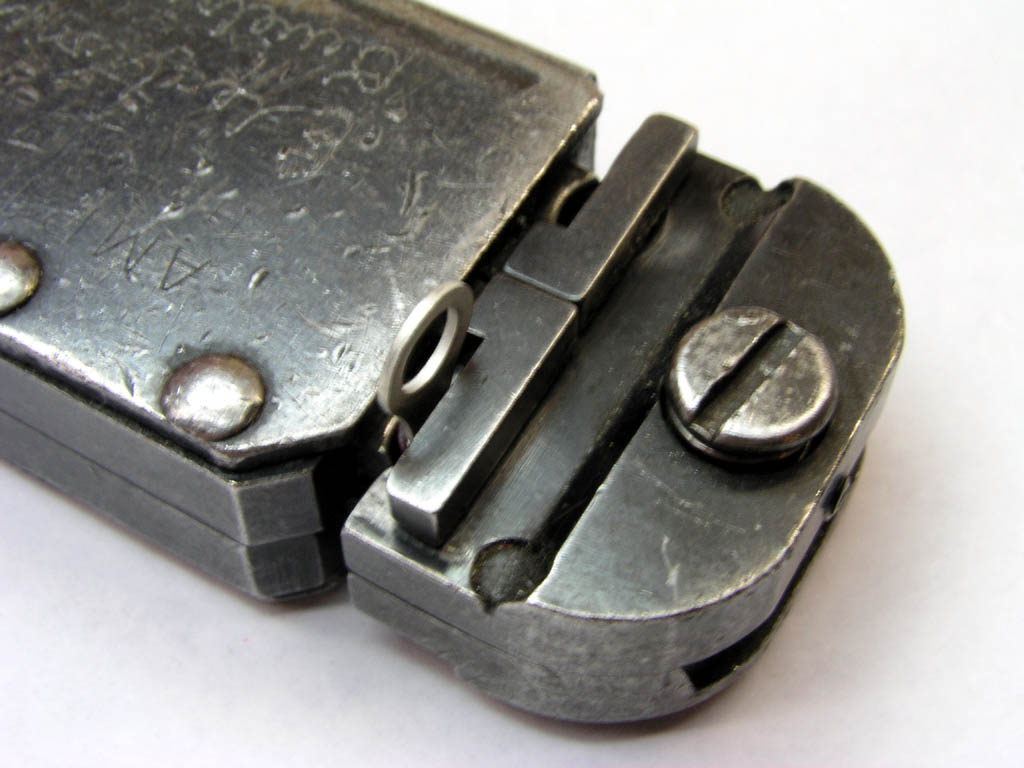
The Hi-Dollar tool has a spring loaded stop that helps you properly
position the terminal in the tool. The stop positions the terminal flag
flat with the plane of the crimp. The terminal wire grip barrel
sets against the stop to control centering in the tool. It also provides
a stop for wire insertion to make sure the bared strands are positioned
just flush with the end of the terminal at crimp time. For the El-Cheapo, just center the plastic barrel in the jaws and orient the terminal flag parallel to the plane of the crimp. Closing the tool down to the first "click" will capture the terminal in proper position. You have to watch the free end of the terminal during wire insertion so that exposed strands are just flush with the end of the wire grip. |
Click Here for Larger Image.
|
As a general rule, tools with unsymetrical dies will attend to the terminal's wire grip with a smaller, closed-die cross section. The larger, lesser-crush opening is for the terminal's insulation grip.
I put this together in something of a hurry. I'd be pleased to hear about errors of spelling or grammar . . . or suggestions for expanding the explanation in useful ways.