|
|
Bob's Shop Notes: |
|
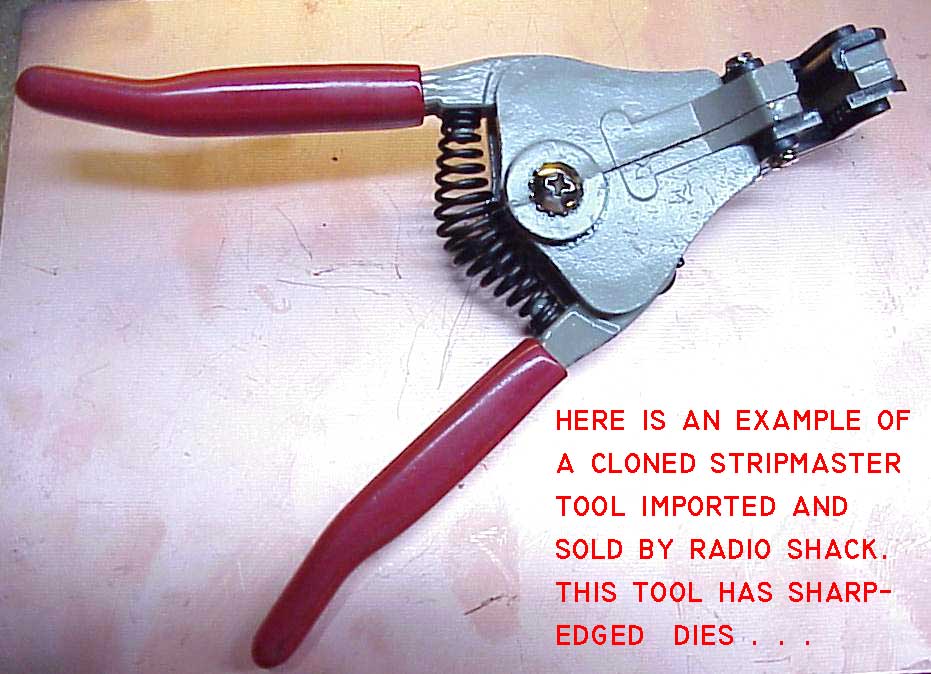
The most copied stripper design . . .Tool catalogs and the shelves of tool stores are replete with examples of what tool designers hope are the greatest wire strippers ever invented. The purpose of this piece is not to praise or disparage any particular tool or technique. My intent is to study and illustrate the physics of wire stripping. Armed with understanding, you're better prepared to evaluate any wire stripping tool and decide for your self if the tool's cost/benefit ratio is worthy of your time and dollars. The tool shown here is a very accurate clone of a design that has been around for at least 40 years. This model is sold by Radio Shack and costs about $12. Dozens if not hundreds of companies make similar tools. These are intended to close precision knife-edged hole over a conductor while simultaneously gripping the wire immediately behind the blades. |
|
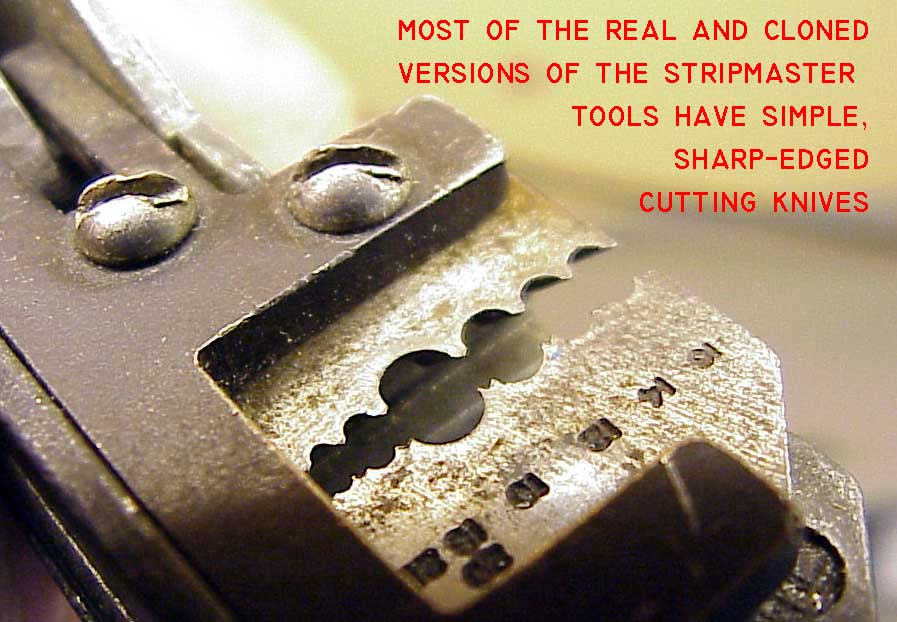
Click here for larger image. A close up inspection of the stripping dies on this tool shows us a relatively simple, knife-edged cutter with holes sized to provide clearance around various wire sizes while the knives are expected to cut the insulation without damaging underlying wires. Squeezing the handles drives the wire-grip and blades apart . . if everything goes well, insulation is neatly removed from the end of the wire. |
|
|
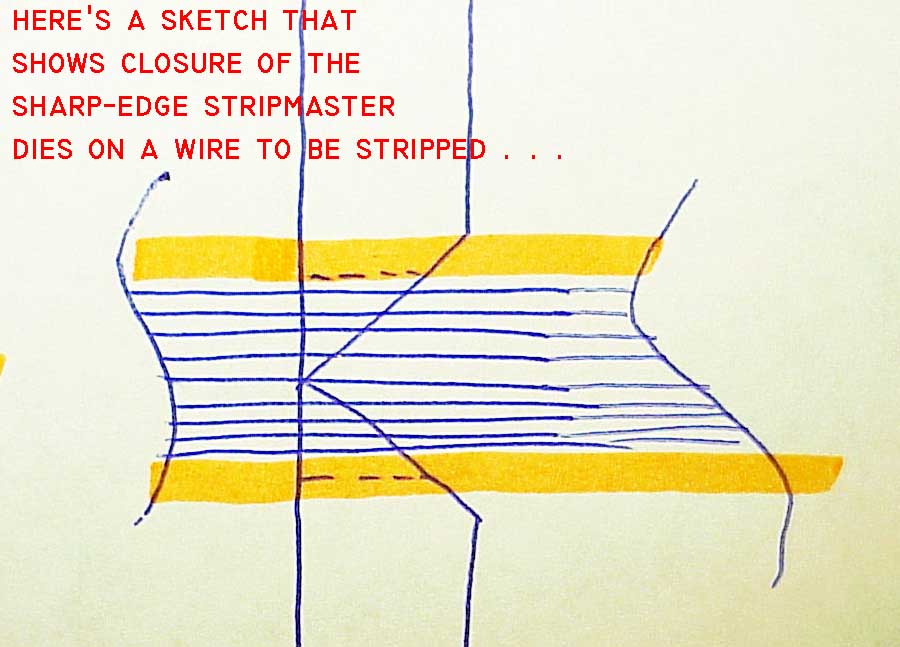
Click here for larger image. A sketch of this stripper's cross section illustrates the manner in which the blades come together. If the wire stranding is oversized or if you use a "too small" opening to strip the wire, there is possibility of damage to the conductors. |
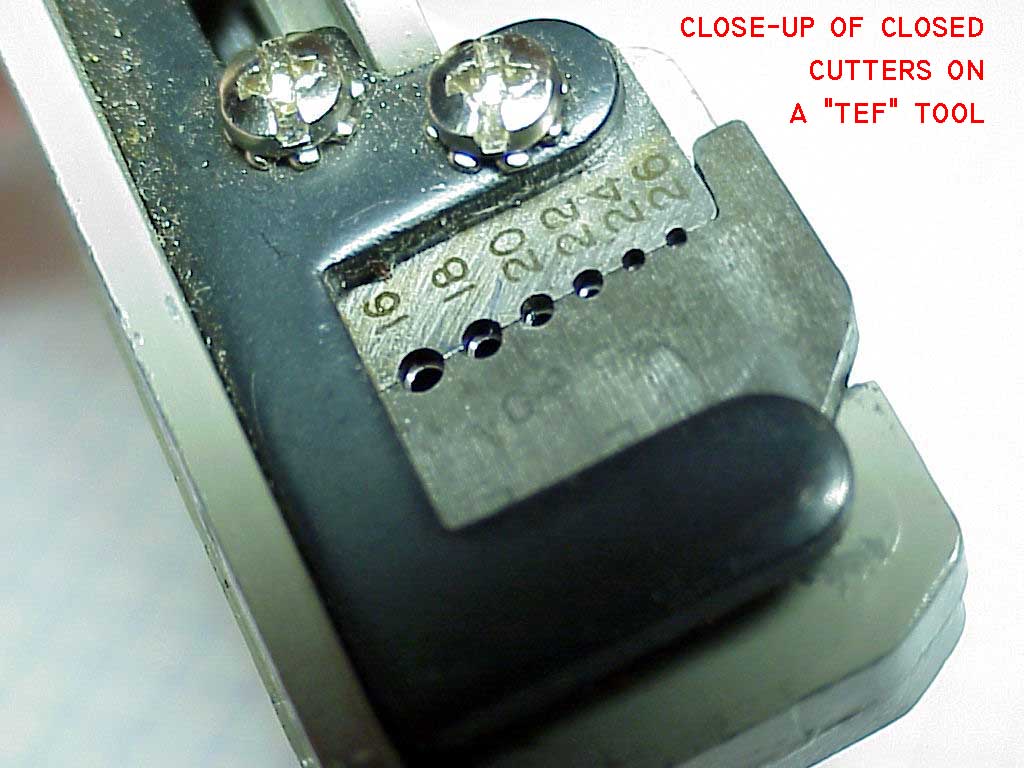
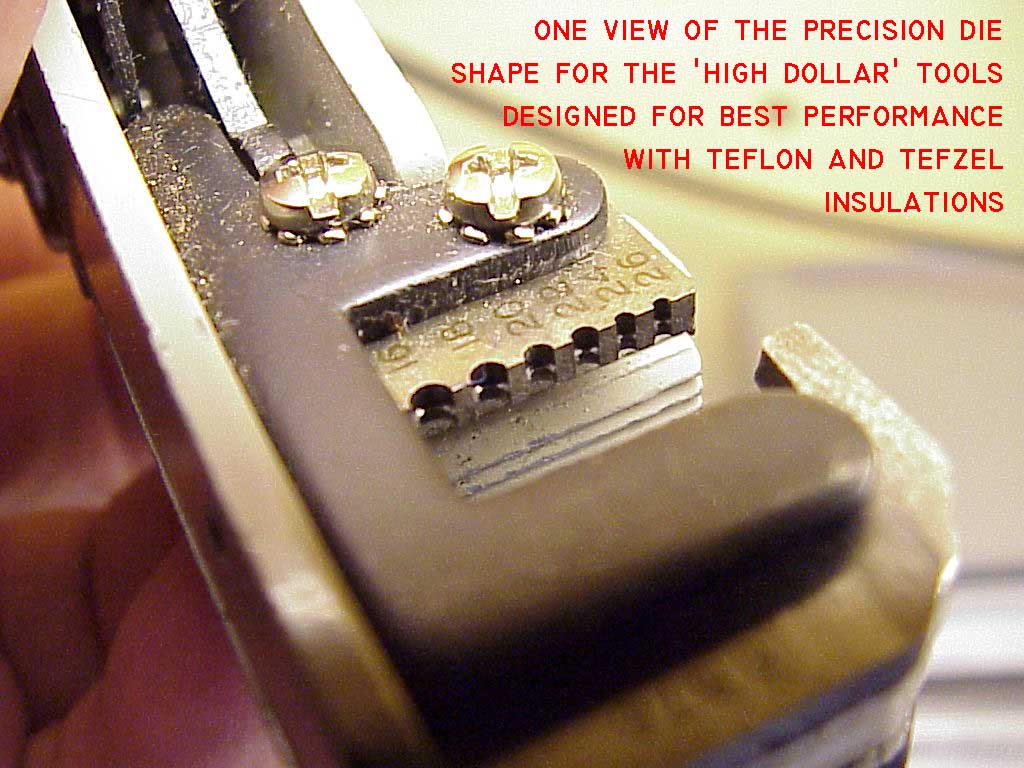
When the insulation is not so user friendly . . .Here's a close up view of the very same tool as shown above except the wire stripping dies are designed a bit different. Here, holes in stripping dies are cylindrical . . . |
|
|
. . but WHAT a difference.Furthermore, the "knives" intended to cut the insulation are not even sharp-edged. One can see that these dies are more difficult to make than the knife-edged dies above . . . but a hundred dollars worth harder? Yep, that's the approximate difference in cost of a stripper with the so-called tefzel or teflon dies and the plain vanilla PVC dies shown above. Unfortunately, these very nice stripping dies come with an equally nice price. Typical pricing for these tools is in the $140 to $160 range.
|
|
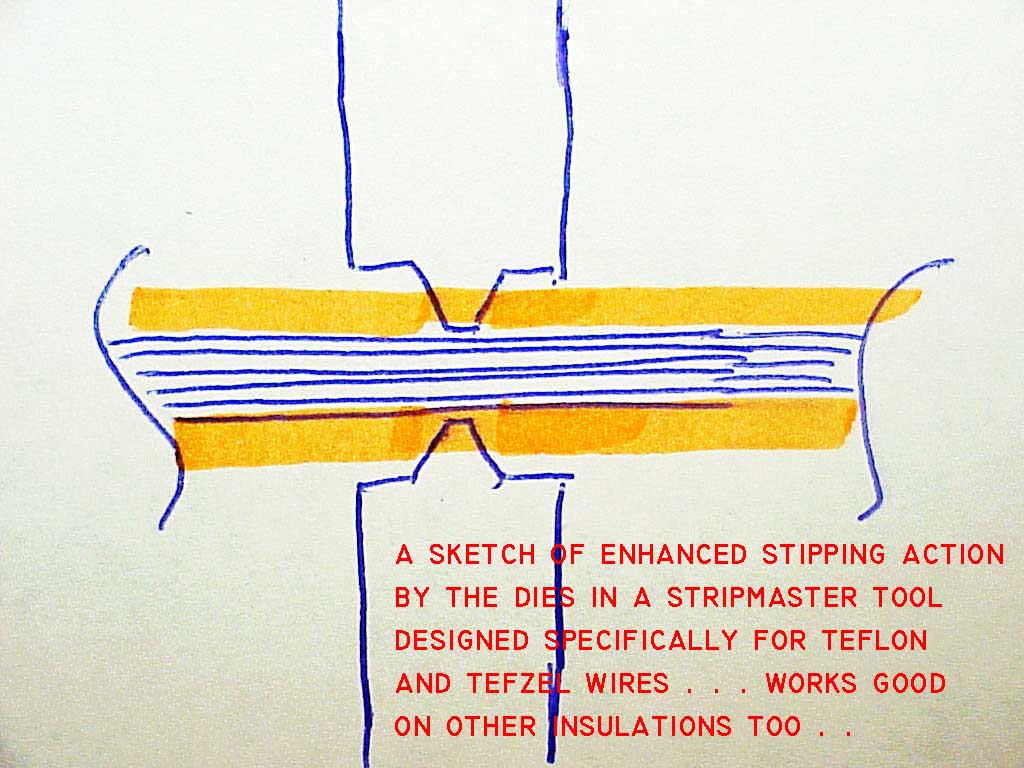
Click here for larger image. Here's a sketch of how the "tef" dies come down on the wire's insulation. Even if the blades do touch the conductors, there are no sharp edges to damage the strands. Obviously, there's not much cutting going on either. My grandma used to harvest the chicken for Sunday dinner by standing on a broomstick placed across the chicken's neck and pulling on the legs . . . no cutting required. Just grab it around the spot where you want to create a stress-riser and pull. Off it comes. |
|
|
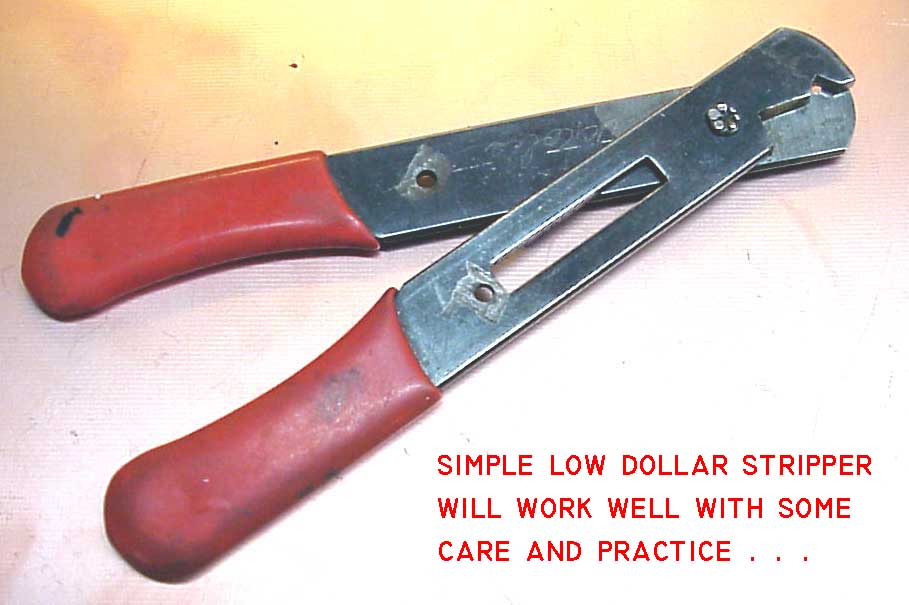
Click here for larger image. This very low cost wire stripper has been in my toolbox for years. In fact, I carry one just like it as the ONLY wire stripper in my super-compact set of tools that I keep in my desk at Raytheon. The tool was sold to me a long time ago with an "adjustable stop" screw and nut that rides in the slotted handle. The other two open holes were where a spring was riveted on . . . ostensibly to make the tool easier to use by having it spring open. I've removed both features and don't miss them. Here's why . . . . If you consider the design of the high dollar stripping dies in the tool above, we can deduce that it is not necessary to CUT insulation from the end of a wire. W When small strands of wire inside are subject to damage by contact with sharp edges, we can see advantages for not having a sharp-edged tool. This low-dollar stripper offers some risk in that regard. That's why I took the spring and adjustable stop off. Stripping wire is like flying an airplane - you don't put POSITION commands into the controls . . . when you're maneuvering an airplane, your perception of control FORCE is more precise than control POSITION. With these el-cheapo strippers, I have learned to grab the wire's insulation with enough force that the blades get a grip on the wire in at least 4 places around it's circumference. The right force provides a grip without cutting . . . I need to induce stress risers in the right places and then pull the insulation off. In fact, this tool is so old and "dull" at the finished edges of the notch that it's fairly safe to use around relatively fragile conductors of a 19-strand, 22AWG wire. |
|
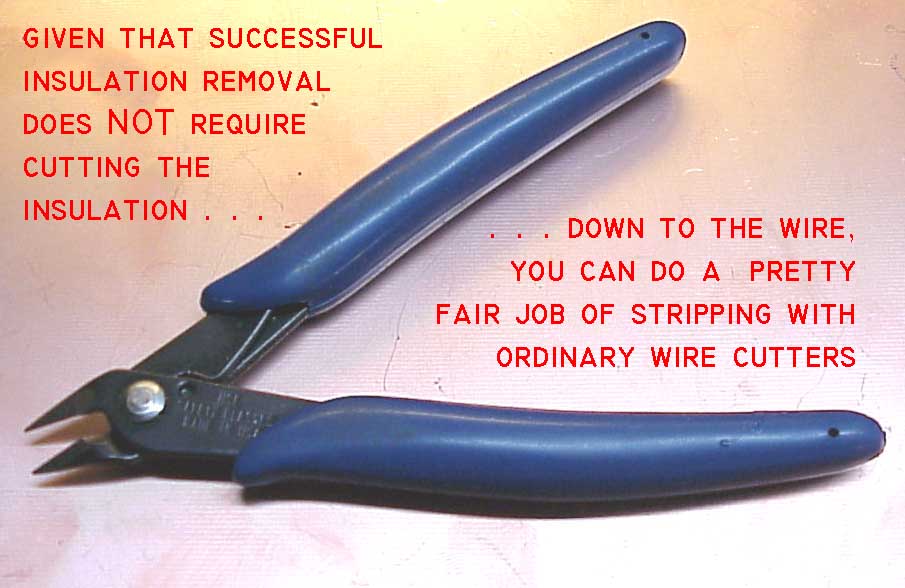
Click here for larger image. On occasion, I've invited the displeasure of various observers by stripping the end of a wire with this kind of tool. This critter IS sharp . . . it IS designed to CUT wires but that doesn't mean that you HAVE to cut wires. I have taught myself to give the insulation a little mash with the sharpened edges and then rotate the tool 90 degrees. Apply and hold a second mash and then pull. The insulation comes off with no contact of the blades against wire strands.
|
|
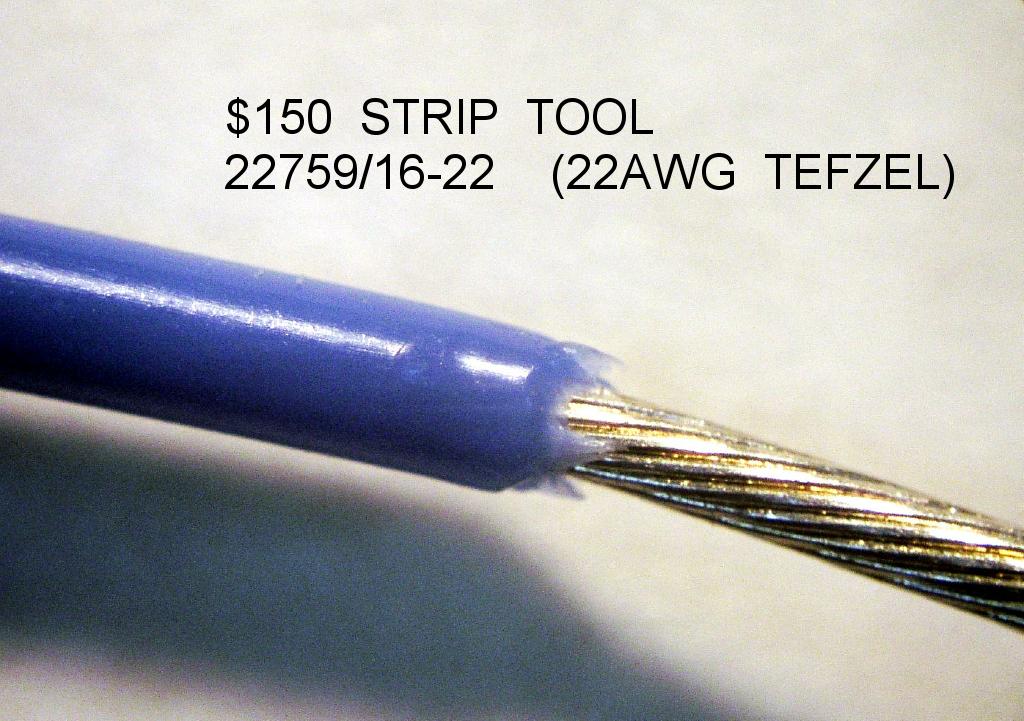 |
Click here for larger image. Here's a microphotograph of a 22AWG Tefzel wire stripped with my $150 strippers described above. |
| Click here for larger image. Here's a microphotograph
of the same style of wire stripped with wire cutters using technique cited above. Insulation isn't
cut away as cleanly but it's still quite adequate. Note that there are no nicked or
scraped strands. At every weekend seminar, I will circulate various crimp tools, terminals and pieces of wire for attendees to try. I could also supply the high dollar strippers for these hands-on demonstrations. I believe it's more useful to have students use a pair of flush-cutters to get a feel for what's necessary to achieve a useful wire stripping action. I'm not necessarily recommending that you don't invest in a good pair of strippers. The goal of the demonstration and for this article is to show that it's not necessary. With a bit of practice one can perhaps expend limited dollars on more useful tools. | 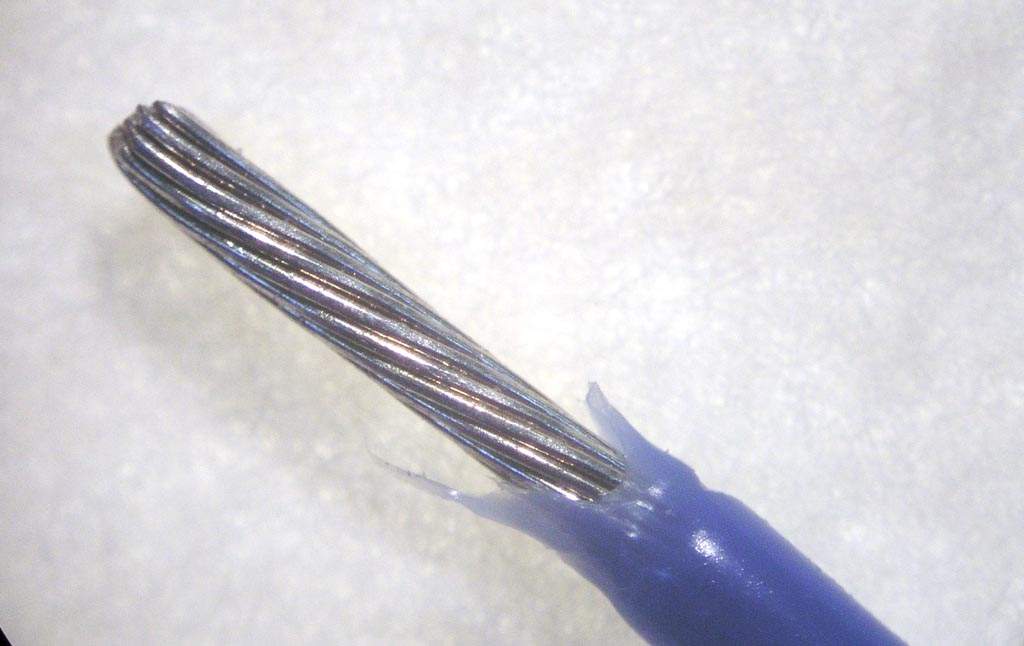 |
This is fun to do in front of some puffed-up inspector-type who is ready to have me keel-hauled for having damaged a wire that I intend to connect to an airplane. I invite him to get out his magnifying glass and show me damaged strands. Admittedly, the END of the INSULATION doesn't come off as cleanly as with the high-dollar tool but it's not bad either. The slightly ragged insulation does not interfere with the final installation and in most situations, the rough end disappears inside the insulation grip of a terminal or inside the back-shell of a connector and you can't even see it.
If one understands the task there may be a number of ways to skin the proverbial cat no matter what tools are at hand. All of the tools illustrated above were found in my various tool boxes. When I'm working at the bench, I make regular use of both the high-dollar strippers and Radio Shack Stripmaster clones - they DO offer a level of convenience and low-effort repeatability. However, there are ways to get the job done in a technically sound manner when working with tools that come from a little wooden box that fits in a briefcase.
Bottom line is that you can try out and/or learn to use a variety of stripping tools and decide which ones best meet your needs, patience and willingness to acquire some new skills. UNDERSTANDING how it's suppose to work and what the requirements are for end results will give you a lot of latitude for adopting various solutions.
Happy stripping . . .
'lectric Bob
 Click here to contact Bob at AeroElectric Connection Click here to contact Bob at AeroElectric Connection |