 |
Matronics Email Lists
Web Forum Interface to the Matronics Email Lists
|
| View previous topic :: View next topic |
| Author |
Message |
sstearns2(at)yahoo.com
Guest
|
 Posted: Mon Apr 04, 2016 11:50 am Post subject: fairing ? Posted: Mon Apr 04, 2016 11:50 am Post subject: fairing ? |
 |
|
Hi Al,

The fairings in the picture are for the aft wing root area.  The flap fits in the triangular area.  There should be a top and bottom.

For the bottom wing root fairing on my TR-1 did a three ply release off the bottom of the wing and trimmed it to cover the bottom wing root area.   I was planning to do the same on the TR-4.

Maybe the kits came with a part like that and I just haven't seen one.

Scott

       From: Alfred Rosa <fredorosa(at)gmail.com>

 To: kisbuilders <kis-list(at)matronics.com>

 Sent: Monday, April 4, 2016 11:28 AM

 Subject: fairing ?


Hi all,  I'm in the process of installing wing fairings on the Cruiser.The top fairing is self explanatory but I don't know what to do with the two fairing

shapes left over.

Can anyone tell me what these are and where they go.  Also, since the manual doesn't give much info on the bottom fairings can someone provide a picture how they handled that?

Al Rosa
| | - The Matronics KIS-List Email Forum - | | | Use the List Feature Navigator to browse the many List utilities available such as the Email Subscriptions page, Archive Search & Download, 7-Day Browse, Chat, FAQ, Photoshare, and much more:
http://www.matronics.com/Navigator?KIS-List |
|
|
|
| Back to top |
|
 |
Robert Reed
Joined: 22 Oct 2009
Posts: 331
Location: Dallas/Ft.Worth
|
| Posted: Mon Apr 04, 2016 1:25 pm Post subject: fairing ? |
|
|
Al,
The assembly shown is the bottom fairing which matches up to the top fairing at the back. The flat edge bonds to the underside of upper fairing and the curve mates to the upper fairing. There are some photos on my website in the Pre-assembly wing section. They aren't great shots but hopefully will give you an idea.
Bob Reed
Sent from my iPad
| Quote: | On Apr 4, 2016, at 1:28 PM, Alfred Rosa <fredorosa(at)gmail.com> wrote:
Hi all, I'm in the process of installing wing fairings on the Cruiser.
The top fairing is self explanatory but I don't know what to do with the two fairing
shapes left over.
Can anyone tell me what these are and where they go. Also, since the manual doesn't give much info on the bottom fairings can someone provide a picture how they handled that?
Al Rosa
<IMG_0615.jpg>
|
| | - The Matronics KIS-List Email Forum - | | | Use the List Feature Navigator to browse the many List utilities available such as the Email Subscriptions page, Archive Search & Download, 7-Day Browse, Chat, FAQ, Photoshare, and much more:
http://www.matronics.com/Navigator?KIS-List |
|
|
|
| Back to top |
|
|
fredorosa(at)gmail.com
Guest
|
| Posted: Mon Apr 04, 2016 1:37 pm Post subject: fairing ? |
|
|
Thanks Bob. That makes sense. I'll check your web site.
What stage are you at?
Sent from my iPhone
| Quote: | On Apr 4, 2016, at 5:25 PM, Robert Reed <robertr237(at)att.net> wrote:
Al,
The assembly shown is the bottom fairing which matches up to the top fairing at the back. The flat edge bonds to the underside of upper fairing and the curve mates to the upper fairing. There are some photos on my website in the Pre-assembly wing section. They aren't great shots but hopefully will give you an idea.
Bob Reed
Sent from my iPad
> On Apr 4, 2016, at 1:28 PM, Alfred Rosa <fredorosa(at)gmail.com> wrote:
>
> Hi all, I'm in the process of installing wing fairings on the Cruiser.
> The top fairing is self explanatory but I don't know what to do with the two fairing
> shapes left over.
> Can anyone tell me what these are and where they go. Also, since the manual doesn't give much info on the bottom fairings can someone provide a picture how they handled that?
>
> Al Rosa
> <IMG_0615.jpg>
|
| | - The Matronics KIS-List Email Forum - | | | Use the List Feature Navigator to browse the many List utilities available such as the Email Subscriptions page, Archive Search & Download, 7-Day Browse, Chat, FAQ, Photoshare, and much more:
http://www.matronics.com/Navigator?KIS-List |
|
|
|
| Back to top |
|
|
Robert Reed
Joined: 22 Oct 2009
Posts: 331
Location: Dallas/Ft.Worth
|
| Posted: Wed Apr 06, 2016 1:26 pm Post subject: fairing ? |
|
|
Al,
Sorry to take so long getting back to you, I was out of town visiting my mother for her 90th birthday. Wish I could say it was a joyful visit but her health is failing fast.
What stage am I at? Well, mostly I am at the stage where life keeps getting in the way of my hobbies.
Seriously, I am at the state of complete frustration trying to get the plane painted. I spent a huge amount of time sanding and prepping before finally putting on several coats of sandable primer, sanding that and finally applying the finish coats only to have the finish coats peel off. It seems that the time between the primer, sanding, and final coats was too long (weeks to months) and the paint did not bond. As a result, I had to totally strip the plane down to the glass and start over. I have tried to find someone locally to paint it but there is nobody at my airport that can do it and the only sources I have found are several hours drive away and want both arms and legs along with my first born child (between $15000 and $20000) to paint it. All also claimed a 6 month to year waiting time. (Gawd, I wish I were back in Houston, we had a great paint shop right on the field.)
So, I have decided to do it myself AGAIN. This time though, I am going to use a different paint and will spray it myself. I am using the PTI paint system from Aircraft Spruce and will apply with an HVLP Turbine Sprayer. Since I don't have access to a professional spray booth I have purchased a 12 x 27 canopy carport from King Canopy and have wrapped it in 6 mil clear plastic. I will utilize that as a paint booth. I am using the 4-stage Sprayfine HVLP turbine spray system with a forced air respiratory system for breathing. Will be using the paint booth at home configured as 12 x 20 for wings and small parts then reinstall at hangar (open T-hangar) for painting the fuselage. All I need now is some consistently warm weather so I can get the sanding, priming, and final coats done in two consecutive days.
Once painted I will finalize the electrical, assemble, and be ready for first engine start. All glass work is done and the only remaining things to purchase are the panel components. So close and yet so far.
Bob Reed
PS: Al, a word of caution regarding the installation of the wing fairings. The fairings must be fitted after you have at least test fit the wing, set the wing angle, and locked in the position of the rear wing root. In your case the flaps will not need to be installed but for others they would be. Fit the upper fairing to get a smooth fit over the wing all the way back and bond trying NOT to put any stress on the fairing as you do so, otherwise gaps will develop between the wing and the fairing. If I recall correctly, you put a step area on the inner portion of the wing with the flaps being out from that so the lower fairing will fit differently from the standard and can be installed totally different from the normal. It will also warp some if you aren't really careful in the bonding phase.
From: Alfred Rosa <fredorosa(at)gmail.com>
To: "kis-list(at)matronics.com" <kis-list(at)matronics.com>
Sent: Monday, April 4, 2016 4:36 PM
Subject: Re: fairing ?
--> KIS-List message posted by: Alfred Rosa <fredorosa(at)gmail.com (fredorosa(at)gmail.com)>
Thanks Bob. That makes sense. I'll check your web site.
What stage are you at?
Sent from my iPhone
| Quote: | On Apr 4, 2016, at 5:25 PM, Robert Reed <robertr237(at)att.net (robertr237(at)att.net)> wrote:
--> KIS-List message posted by: Robert Reed <robertr237(at)att.net (robertr237(at)att.net)>
Al,
The assembly shown is the bottom fairing which matches up to the top fairing at the back. The flat edge bonds to the underside of upper fairing and the curve mates to the upper fairing. There are some photos on my website in the Pre-assembly wing section. They aren't great shots but hopefully will give you an idea.
Bob Reed
Sent from my iPad
> On Apr 4, 2016, at 1:28 PM, Alfred Rosa <fredorosa(at)gmail.com (fredorosa(at)gmail.com)> wrote:
>
> Hi all, I'm in the process of installing wing fairings on the Cruiser.
> The top fairing is self explanatory but I don't know what to do with the two fairing
> shapes left over.
> Can anyone tell me what these are and where they go. Also, since the manual doesn't give much info on the bottom fairings can someone provide a picture how they handled that?
>
> Al Rosa
> <IMG_0615.jpg>
http://www.matronics.com/Navisp; - MATRONICS WEB FORUMS -
= --> http
|
| | - The Matronics KIS-List Email Forum - | | | Use the List Feature Navigator to browse the many List utilities available such as the Email Subscriptions page, Archive Search & Download, 7-Day Browse, Chat, FAQ, Photoshare, and much more:
http://www.matronics.com/Navigator?KIS-List |
|
|
|
| Back to top |
|
|
randy.ott(at)gmail.com
Guest
|
| Posted: Wed Apr 06, 2016 1:50 pm Post subject: fairing ? |
|
|
Have you considered doing a vinyl wrap ???
I wrapped my entire Velocity aircraft for under $2k in materials. ..and you can do it piecemeal .. So far it has held up fine to our 200 mph skip stream . It's one year old and looks as good as it did the day I put it on .
Let me know if you need help !
Randy Ott
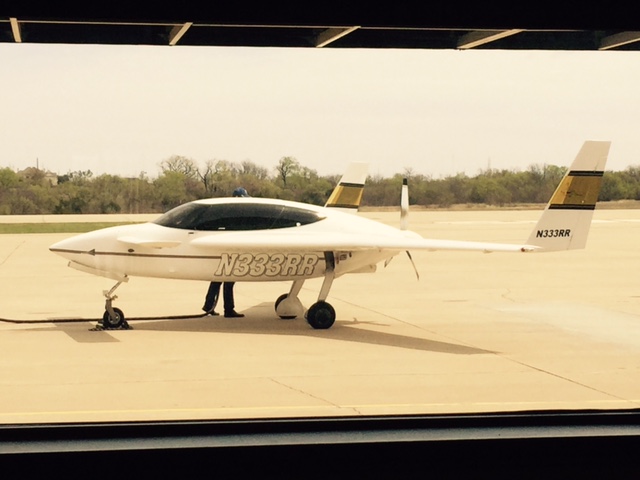
KIS N 96BT
Velocity N333RR
Sent from my iPhone
On Apr 6, 2016, at 5:25 PM, Robert Reed <robertr237(at)att.net (robertr237(at)att.net)> wrote:
| Quote: | Al,
Sorry to take so long getting back to you, I was out of town visiting my mother for her 90th birthday. Wish I could say it was a joyful visit but her health is failing fast.
What stage am I at? Well, mostly I am at the stage where life keeps getting in the way of my hobbies.
Seriously, I am at the state of complete frustration trying to get the plane painted. I spent a huge amount of time sanding and prepping before finally putting on several coats of sandable primer, sanding that and finally applying the finish coats only to have the finish coats peel off. It seems that the time between the primer, sanding, and final coats was too long (weeks to months) and the paint did not bond. As a result, I had to totally strip the plane down to the glass and start over. I have tried to find someone locally to paint it but there is nobody at my airport that can do it and the only sources I have found are several hours drive away and want both arms and legs along with my first born child (between $15000 and $20000) to paint it. All also claimed a 6 month to year waiting time. (Gawd, I wish I were back in Houston, we had a great paint shop right on the field.)
So, I have decided to do it myself AGAIN. This time though, I am going to use a different paint and will spray it myself. I am using the PTI paint system from Aircraft Spruce and will apply with an HVLP Turbine Sprayer. Since I don't have access to a professional spray booth I have purchased a 12 x 27 canopy carport from King Canopy and have wrapped it in 6 mil clear plastic. I will utilize that as a paint booth. I am using the 4-stage Sprayfine HVLP turbine spray system with a forced air respiratory system for breathing. Will be using the paint booth at home configured as 12 x 20 for wings and small parts then reinstall at hangar (open T-hangar) for painting the fuselage. All I need now is some consistently warm weather so I can get the sanding, priming, and final coats done in two consecutive days.
Once painted I will finalize the electrical, assemble, and be ready for first engine start. All glass work is done and the only remaining things to purchase are the panel components. So close and yet so far.
Bob Reed
PS: Al, a word of caution regarding the installation of the wing fairings. The fairings must be fitted after you have at least test fit the wing, set the wing angle, and locked in the position of the rear wing root. In your case the flaps will not need to be installed but for others they would be. Fit the upper fairing to get a smooth fit over the wing all the way back and bond trying NOT to put any stress on the fairing as you do so, otherwise gaps will develop between the wing and the fairing. If I recall correctly, you put a step area on the inner portion of the wing with the flaps being out from that so the lower fairing will fit differently from the standard and can be installed totally different from the normal. It will also warp some if you aren't really careful in the bonding phase.
From: Alfred Rosa <fredorosa(at)gmail.com (fredorosa(at)gmail.com)>
To: "kis-list(at)matronics.com (kis-list(at)matronics.com)" <kis-list(at)matronics.com (kis-list(at)matronics.com)>
Sent: Monday, April 4, 2016 4:36 PM
Subject: Re: fairing ?
--> KIS-List message posted by: Alfred Rosa <fredorosa(at)gmail.com (fredorosa(at)gmail.com)>
Thanks Bob. That makes sense. I'll check your web site.
What stage are you at?
Sent from my iPhone
| Quote: | On Apr 4, 2016, at 5:25 PM, Robert Reed <robertr237(at)att.net (robertr237(at)att.net)> wrote:
--> KIS-List message posted by: Robert Reed <robertr237(at)att.net (robertr237(at)att.net)>
Al,
The assembly shown is the bottom fairing which matches up to the top fairing at the back. The flat edge bonds to the underside of upper fairing and the curve mates to the upper fairing. There are some photos on my website in the Pre-assembly wing section. They aren't great shots but hopefully will give you an idea.
Bob Reed
Sent from my iPad
> On Apr 4, 2016, at 1:28 PM, Alfred Rosa <fredorosa(at)gmail.com (fredorosa(at)gmail.com)> wrote:
>
> Hi all, I'm in the process of installing wing fairings on the Cruiser.
> The top fairing is self explanatory but I don't know what to do with the two fairing
> shapes left over.
> Can anyone tell me what these are and where they go. Also, since the manual doesn't give much info on the bottom fairings can someone provide a picture how they handled that?
>
> Al Rosa
> <IMG_0615.jpg>
http://www.matronics.com/Navisp; - MATRONICS WEB FORUMS -
= --> http
|
|
| | - The Matronics KIS-List Email Forum - | | | Use the List Feature Navigator to browse the many List utilities available such as the Email Subscriptions page, Archive Search & Download, 7-Day Browse, Chat, FAQ, Photoshare, and much more:
http://www.matronics.com/Navigator?KIS-List |
|
|
|
| Back to top |
|
|
randy.ott(at)gmail.com
Guest
|
| Posted: Wed Apr 06, 2016 1:56 pm Post subject: fairing ? |
|
|
[img]cid:9C645922-6719-4B63-8727-12301284B9CF[/img]
Sent from my iPhone
On Apr 6, 2016, at 5:25 PM, Robert Reed <robertr237(at)att.net (robertr237(at)att.net)> wrote:
| Quote: | Al,
Sorry to take so long getting back to you, I was out of town visiting my mother for her 90th birthday. Wish I could say it was a joyful visit but her health is failing fast.
What stage am I at? Well, mostly I am at the stage where life keeps getting in the way of my hobbies.
Seriously, I am at the state of complete frustration trying to get the plane painted. I spent a huge amount of time sanding and prepping before finally putting on several coats of sandable primer, sanding that and finally applying the finish coats only to have the finish coats peel off. It seems that the time between the primer, sanding, and final coats was too long (weeks to months) and the paint did not bond. As a result, I had to totally strip the plane down to the glass and start over. I have tried to find someone locally to paint it but there is nobody at my airport that can do it and the only sources I have found are several hours drive away and want both arms and legs along with my first born child (between $15000 and $20000) to paint it. All also claimed a 6 month to year waiting time. (Gawd, I wish I were back in Houston, we had a great paint shop right on the field.)
So, I have decided to do it myself AGAIN. This time though, I am going to use a different paint and will spray it myself. I am using the PTI paint system from Aircraft Spruce and will apply with an HVLP Turbine Sprayer. Since I don't have access to a professional spray booth I have purchased a 12 x 27 canopy carport from King Canopy and have wrapped it in 6 mil clear plastic. I will utilize that as a paint booth. I am using the 4-stage Sprayfine HVLP turbine spray system with a forced air respiratory system for breathing. Will be using the paint booth at home configured as 12 x 20 for wings and small parts then reinstall at hangar (open T-hangar) for painting the fuselage. All I need now is some consistently warm weather so I can get the sanding, priming, and final coats done in two consecutive days.
Once painted I will finalize the electrical, assemble, and be ready for first engine start. All glass work is done and the only remaining things to purchase are the panel components. So close and yet so far.
Bob Reed
PS: Al, a word of caution regarding the installation of the wing fairings. The fairings must be fitted after you have at least test fit the wing, set the wing angle, and locked in the position of the rear wing root. In your case the flaps will not need to be installed but for others they would be. Fit the upper fairing to get a smooth fit over the wing all the way back and bond trying NOT to put any stress on the fairing as you do so, otherwise gaps will develop between the wing and the fairing. If I recall correctly, you put a step area on the inner portion of the wing with the flaps being out from that so the lower fairing will fit differently from the standard and can be installed totally different from the normal. It will also warp some if you aren't really careful in the bonding phase.
From: Alfred Rosa <fredorosa(at)gmail.com (fredorosa(at)gmail.com)>
To: "kis-list(at)matronics.com (kis-list(at)matronics.com)" <kis-list(at)matronics.com (kis-list(at)matronics.com)>
Sent: Monday, April 4, 2016 4:36 PM
Subject: Re: fairing ?
--> KIS-List message posted by: Alfred Rosa <fredorosa(at)gmail.com (fredorosa(at)gmail.com)>
Thanks Bob. That makes sense. I'll check your web site.
What stage are you at?
Sent from my iPhone
| Quote: | On Apr 4, 2016, at 5:25 PM, Robert Reed <robertr237(at)att.net (robertr237(at)att.net)> wrote:
--> KIS-List message posted by: Robert Reed <robertr237(at)att.net (robertr237(at)att.net)>
Al,
The assembly shown is the bottom fairing which matches up to the top fairing at the back. The flat edge bonds to the underside of upper fairing and the curve mates to the upper fairing. There are some photos on my website in the Pre-assembly wing section. They aren't great shots but hopefully will give you an idea.
Bob Reed
Sent from my iPad
> On Apr 4, 2016, at 1:28 PM, Alfred Rosa <fredorosa(at)gmail.com (fredorosa(at)gmail.com)> wrote:
>
> Hi all, I'm in the process of installing wing fairings on the Cruiser.
> The top fairing is self explanatory but I don't know what to do with the two fairing
> shapes left over.
> Can anyone tell me what these are and where they go. Also, since the manual doesn't give much info on the bottom fairings can someone provide a picture how they handled that?
>
> Al Rosa
> <IMG_0615.jpg>
http://www.matronics.com/Navisp; - MATRONICS WEB FORUMS -
= --> http
|
|
| | - The Matronics KIS-List Email Forum - | | | Use the List Feature Navigator to browse the many List utilities available such as the Email Subscriptions page, Archive Search & Download, 7-Day Browse, Chat, FAQ, Photoshare, and much more:
http://www.matronics.com/Navigator?KIS-List |
|
| Description: |
|
| Filesize: |
75.77 KB |
| Viewed: |
11934 Time(s) |

|
|
|
| Back to top |
|
|
randy.ott(at)gmail.com
Guest
|
| Posted: Wed Apr 06, 2016 2:00 pm Post subject: fairing ? |
|
|
[img]cid:15F28E0F-5520-47CC-A092-BABB760F83DD[/img]
I did this all by my self ... With no prior experience in vinyl work !
Sent from my iPhone
On Apr 6, 2016, at 5:25 PM, Robert Reed <robertr237(at)att.net (robertr237(at)att.net)> wrote:
| Quote: | Al,
Sorry to take so long getting back to you, I was out of town visiting my mother for her 90th birthday. Wish I could say it was a joyful visit but her health is failing fast.
What stage am I at? Well, mostly I am at the stage where life keeps getting in the way of my hobbies.
Seriously, I am at the state of complete frustration trying to get the plane painted. I spent a huge amount of time sanding and prepping before finally putting on several coats of sandable primer, sanding that and finally applying the finish coats only to have the finish coats peel off. It seems that the time between the primer, sanding, and final coats was too long (weeks to months) and the paint did not bond. As a result, I had to totally strip the plane down to the glass and start over. I have tried to find someone locally to paint it but there is nobody at my airport that can do it and the only sources I have found are several hours drive away and want both arms and legs along with my first born child (between $15000 and $20000) to paint it. All also claimed a 6 month to year waiting time. (Gawd, I wish I were back in Houston, we had a great paint shop right on the field.)
So, I have decided to do it myself AGAIN. This time though, I am going to use a different paint and will spray it myself. I am using the PTI paint system from Aircraft Spruce and will apply with an HVLP Turbine Sprayer. Since I don't have access to a professional spray booth I have purchased a 12 x 27 canopy carport from King Canopy and have wrapped it in 6 mil clear plastic. I will utilize that as a paint booth. I am using the 4-stage Sprayfine HVLP turbine spray system with a forced air respiratory system for breathing. Will be using the paint booth at home configured as 12 x 20 for wings and small parts then reinstall at hangar (open T-hangar) for painting the fuselage. All I need now is some consistently warm weather so I can get the sanding, priming, and final coats done in two consecutive days.
Once painted I will finalize the electrical, assemble, and be ready for first engine start. All glass work is done and the only remaining things to purchase are the panel components. So close and yet so far.
Bob Reed
PS: Al, a word of caution regarding the installation of the wing fairings. The fairings must be fitted after you have at least test fit the wing, set the wing angle, and locked in the position of the rear wing root. In your case the flaps will not need to be installed but for others they would be. Fit the upper fairing to get a smooth fit over the wing all the way back and bond trying NOT to put any stress on the fairing as you do so, otherwise gaps will develop between the wing and the fairing. If I recall correctly, you put a step area on the inner portion of the wing with the flaps being out from that so the lower fairing will fit differently from the standard and can be installed totally different from the normal. It will also warp some if you aren't really careful in the bonding phase.
From: Alfred Rosa <fredorosa(at)gmail.com (fredorosa(at)gmail.com)>
To: "kis-list(at)matronics.com (kis-list(at)matronics.com)" <kis-list(at)matronics.com (kis-list(at)matronics.com)>
Sent: Monday, April 4, 2016 4:36 PM
Subject: Re: fairing ?
--> KIS-List message posted by: Alfred Rosa <fredorosa(at)gmail.com (fredorosa(at)gmail.com)>
Thanks Bob. That makes sense. I'll check your web site.
What stage are you at?
Sent from my iPhone
| Quote: | On Apr 4, 2016, at 5:25 PM, Robert Reed <robertr237(at)att.net (robertr237(at)att.net)> wrote:
--> KIS-List message posted by: Robert Reed <robertr237(at)att.net (robertr237(at)att.net)>
Al,
The assembly shown is the bottom fairing which matches up to the top fairing at the back. The flat edge bonds to the underside of upper fairing and the curve mates to the upper fairing. There are some photos on my website in the Pre-assembly wing section. They aren't great shots but hopefully will give you an idea.
Bob Reed
Sent from my iPad
> On Apr 4, 2016, at 1:28 PM, Alfred Rosa <fredorosa(at)gmail.com (fredorosa(at)gmail.com)> wrote:
>
> Hi all, I'm in the process of installing wing fairings on the Cruiser.
> The top fairing is self explanatory but I don't know what to do with the two fairing
> shapes left over.
> Can anyone tell me what these are and where they go. Also, since the manual doesn't give much info on the bottom fairings can someone provide a picture how they handled that?
>
> Al Rosa
> <IMG_0615.jpg>
http://www.matronics.com/Navisp; - MATRONICS WEB FORUMS -
= --> http
|
|
| | - The Matronics KIS-List Email Forum - | | | Use the List Feature Navigator to browse the many List utilities available such as the Email Subscriptions page, Archive Search & Download, 7-Day Browse, Chat, FAQ, Photoshare, and much more:
http://www.matronics.com/Navigator?KIS-List |
|
| Description: |
|
| Filesize: |
648.24 KB |
| Viewed: |
11933 Time(s) |

|
|
|
| Back to top |
|
|
Robert Reed
Joined: 22 Oct 2009
Posts: 331
Location: Dallas/Ft.Worth
|
| Posted: Wed Apr 06, 2016 2:08 pm Post subject: fairing ? |
|
|
Randy,
You have my absolute admiration for being able to vinyl wrap your plane. Yes, I did consider the vinyl wrap route after the initial disaster with painting my fuselage. I decided to try to wrap my ailerons first and it was a total cluster. I had already painted the parts and was told they needed to be painted before application of the vinyl. Started applying the vinyl and got one side on pretty well but then I got a wrinkle and needed to reposition the vinyl once on the second side. I had not pressed it down yet so I Pulled it away from the part and the paint came off with the vinyl. Had to remove it all and that's when I realized that I would have to strip everything. I wasn't convinced the unpainted parts would be protected from UV without the paint and I was having a fit trying to deal with the vinyl application on the loose parts.
I retained most of the vinyl that I bought and will use it for the color trim. I am also considering using a strip of the white for application to the leading edge of the wing.
Bob
From: Randy Ott <randy.ott(at)gmail.com>
To: "kis-list(at)matronics.com" <kis-list(at)matronics.com>
Sent: Wednesday, April 6, 2016 4:50 PM
Subject: Re: fairing ?
Have you considered doing a vinyl wrap ???
I wrapped my entire Velocity aircraft for under $2k in materials. ..and you can do it piecemeal .. So far it has held up fine to our 200 mph skip stream . It's one year old and looks as good as it did the day I put it on .
Let me know if you need help !
Randy Ott
KIS N 96BT
Velocity N333RR
Sent from my iPhone
On Apr 6, 2016, at 5:25 PM, Robert Reed <robertr237(at)att.net (robertr237(at)att.net)> wrote:
| Quote: | Al,
Sorry to take so long getting back to you, I was out of town visiting my mother for her 90th birthday. Wish I could say it was a joyful visit but her health is failing fast.
What stage am I at? Well, mostly I am at the stage where life keeps getting in the way of my hobbies.
Seriously, I am at the state of complete frustration trying to get the plane painted. I spent a huge amount of time sanding and prepping before finally putting on several coats of sandable primer, sanding that and finally applying the finish coats only to have the finish coats peel off. It seems that the time between the primer, sanding, and final coats was too long (weeks to months) and the paint did not bond. As a result, I had to totally strip the plane down to the glass and start over. I have tried to find someone locally to paint it but there is nobody at my airport that can do it and the only sources I have found are several hours drive away and want both arms and legs along with my first born child (between $15000 and $20000) to paint it. All also claimed a 6 month to year waiting time. (Gawd, I wish I were back in Houston, we had a great paint shop right on the field.)
So, I have decided to do it myself AGAIN. This time though, I am going to use a different paint and will spray it myself. I am using the PTI paint system from Aircraft Spruce and will apply with an HVLP Turbine Sprayer. Since I don't have access to a professional spray booth I have purchased a 12 x 27 canopy carport from King Canopy and have wrapped it in 6 mil clear plastic. I will utilize that as a paint booth. I am using the 4-stage Sprayfine HVLP turbine spray system with a forced air respiratory system for breathing. Will be using the paint booth at home configured as 12 x 20 for wings and small parts then reinstall at hangar (open T-hangar) for painting the fuselage. All I need now is some consistently warm weather so I can get the sanding, priming, and final coats done in two consecutive days.
Once painted I will finalize the electrical, assemble, and be ready for first engine start. All glass work is done and the only remaining things to purchase are the panel components. So close and yet so far.
Bob Reed
PS: Al, a word of caution regarding the installation of the wing fairings. The fairings must be fitted after you have at least test fit the wing, set the wing angle, and locked in the position of the rear wing root. In your case the flaps will not need to be installed but for others they would be. Fit the upper fairing to get a smooth fit over the wing all the way back and bond trying NOT to put any stress on the fairing as you do so, otherwise gaps will develop between the wing and the fairing. If I recall correctly, you put a step area on the inner portion of the wing with the flaps being out from that so the lower fairing will fit differently from the standard and can be installed totally different from the normal. It will also warp some if you aren't really careful in the bonding phase.
From: Alfred Rosa <fredorosa(at)gmail.com (fredorosa(at)gmail.com)> To: "kis-list(at)matronics.com (kis-list(at)matronics.com)" <kis-list(at)matronics.com (kis-list(at)matronics.com)> Sent: Monday, April 4, 2016 4:36 PM Subject: Re: fairing ?
--> KIS-List message posted by: Alfred Rosa <fredorosa(at)gmail.com (fredorosa(at)gmail.com)>Thanks Bob. That makes sense. I'll check your web site. What stage are you at?Sent from my iPhone> On Apr 4, 2016, at 5:25 PM, Robert Reed <robertr237(at)att.net (robertr237(at)att.net)> wrote:> > --> KIS-List message posted by: Robert Reed <robertr237(at)att.net (robertr237(at)att.net)>> > Al,> > The assembly shown is the bottom fairing which matches up to the top fairing at the back. The flat edge bonds to the underside of upper fairing and the curve mates to the upper fairing. There are some photos on my website in the Pre-assembly wing section. They aren't great shots but hopefully will give you an idea. > > Bob Reed> > Sent from my iPad> >> On Apr 4, 2016, at 1:28 PM, Alfred Rosa <fredorosa(at)gmail.com (fredorosa(at)gmail.com)> wrote:>> >> Hi all, I'm in the process of installing wing fairings on the Cruiser.>> The top fairing is self explanatory but I don't know what to do with the two fairing>> shapes left over.>> Can anyone tell me what these are and where they go. Also, since the manual doesn't give much info on the bottom fairings can someone provide a picture how they handled that?>> >> Al Rosa>> <IMG_0615.jpg>> > > > http://www.matronics.com/Navisp; - MATRONICS WEB FORUMS -= --> http
|
| | - The Matronics KIS-List Email Forum - | | | Use the List Feature Navigator to browse the many List utilities available such as the Email Subscriptions page, Archive Search & Download, 7-Day Browse, Chat, FAQ, Photoshare, and much more:
http://www.matronics.com/Navigator?KIS-List |
|
|
|
| Back to top |
|
|
Robert Reed
Joined: 22 Oct 2009
Posts: 331
Location: Dallas/Ft.Worth
|
| Posted: Wed Apr 06, 2016 2:14 pm Post subject: fairing ? |
|
|
GREAT JOB! It really looks good, beautiful plane.
Bob
PS: Beautiful pilot too!
From: Randy Ott <randy.ott(at)gmail.com>
To: "kis-list(at)matronics.com" <kis-list(at)matronics.com>
Sent: Wednesday, April 6, 2016 5:00 PM
Subject: Re: fairing ?
[img]cid:JW9M2FUB53cxzFl3oTNi[/img]I did this all by my self ... With no prior experience in vinyl work !Sent from my iPhone
On Apr 6, 2016, at 5:25 PM, Robert Reed <robertr237(at)att.net (robertr237(at)att.net)> wrote:
| Quote: | Al,
Sorry to take so long getting back to you, I was out of town visiting my mother for her 90th birthday. Wish I could say it was a joyful visit but her health is failing fast.
What stage am I at? Well, mostly I am at the stage where life keeps getting in the way of my hobbies.
Seriously, I am at the state of complete frustration trying to get the plane painted. I spent a huge amount of time sanding and prepping before finally putting on several coats of sandable primer, sanding that and finally applying the finish coats only to have the finish coats peel off. It seems that the time between the primer, sanding, and final coats was too long (weeks to months) and the paint did not bond. As a result, I had to totally strip the plane down to the glass and start over. I have tried to find someone locally to paint it but there is nobody at my airport that can do it and the only sources I have found are several hours drive away and want both arms and legs along with my first born child (between $15000 and $20000) to paint it. All also claimed a 6 month to year waiting time. (Gawd, I wish I were back in Houston, we had a great paint shop right on the field.)
So, I have decided to do it myself AGAIN. This time though, I am going to use a different paint and will spray it myself. I am using the PTI paint system from Aircraft Spruce and will apply with an HVLP Turbine Sprayer. Since I don't have access to a professional spray booth I have purchased a 12 x 27 canopy carport from King Canopy and have wrapped it in 6 mil clear plastic. I will utilize that as a paint booth. I am using the 4-stage Sprayfine HVLP turbine spray system with a forced air respiratory system for breathing. Will be using the paint booth at home configured as 12 x 20 for wings and small parts then reinstall at hangar (open T-hangar) for painting the fuselage. All I need now is some consistently warm weather so I can get the sanding, priming, and final coats done in two consecutive days.
Once painted I will finalize the electrical, assemble, and be ready for first engine start. All glass work is done and the only remaining things to purchase are the panel components. So close and yet so far.
Bob Reed
PS: Al, a word of caution regarding the installation of the wing fairings. The fairings must be fitted after you have at least test fit the wing, set the wing angle, and locked in the position of the rear wing root. In your case the flaps will not need to be installed but for others they would be. Fit the upper fairing to get a smooth fit over the wing all the way back and bond trying NOT to put any stress on the fairing as you do so, otherwise gaps will develop between the wing and the fairing. If I recall correctly, you put a step area on the inner portion of the wing with the flaps being out from that so the lower fairing will fit differently from the standard and can be installed totally different from the normal. It will also warp some if you aren't really careful in the bonding phase.
From: Alfred Rosa <fredorosa(at)gmail.com (fredorosa(at)gmail.com)> To: "kis-list(at)matronics.com (kis-list(at)matronics.com)" <kis-list(at)matronics.com (kis-list(at)matronics.com)> Sent: Monday, April 4, 2016 4:36 PM Subject: Re: fairing ?
--> KIS-List message posted by: Alfred Rosa <fredorosa(at)gmail.com (fredorosa(at)gmail.com)>Thanks Bob. That makes sense. I'll check your web site. What stage are you at?Sent from my iPhone> On Apr 4, 2016, at 5:25 PM, Robert Reed <robertr237(at)att.net (robertr237(at)att.net)> wrote:> > --> KIS-List message posted by: Robert Reed <robertr237(at)att.net (robertr237(at)att.net)>> > Al,> > The assembly shown is the bottom fairing which matches up to the top fairing at the back. The flat edge bonds to the underside of upper fairing and the curve mates to the upper fairing. There are some photos on my website in the Pre-assembly wing section. They aren't great shots but hopefully will give you an idea. > > Bob Reed> > Sent from my iPad> >> On Apr 4, 2016, at 1:28 PM, Alfred Rosa <fredorosa(at)gmail.com (fredorosa(at)gmail.com)> wrote:>> >> Hi all, I'm in the process of installing wing fairings on the Cruiser.>> The top fairing is self explanatory but I don't know what to do with the two fairing>> shapes left over.>> Can anyone tell me what these are and where they go. Also, since the manual doesn't give much info on the bottom fairings can someone provide a picture how they handled that?>> >> Al Rosa>> <IMG_0615.jpg>> > > > http://www.matronics.com/Navisp; - MATRONICS WEB FORUMS -= --> http
|
| | - The Matronics KIS-List Email Forum - | | | Use the List Feature Navigator to browse the many List utilities available such as the Email Subscriptions page, Archive Search & Download, 7-Day Browse, Chat, FAQ, Photoshare, and much more:
http://www.matronics.com/Navigator?KIS-List |
|
| Description: |
|
| Filesize: |
648.24 KB |
| Viewed: |
11933 Time(s) |

|
|
|
| Back to top |
|
|
Robert Reed
Joined: 22 Oct 2009
Posts: 331
Location: Dallas/Ft.Worth
|
| Posted: Wed Apr 06, 2016 2:21 pm Post subject: fairing ? |
|
|
Randy,
I have to comment on your N-Number. You are braver than I with the last two letters. I thought about "N247RR" but will use "N247BR" instead. I could just imagine some controller calling out "Romeo Romeo where for art thou" and decided I would rather hear "Bravo Romeo" instead.
Again, that is one very nice looking plane.
Bob
From: Randy Ott <randy.ott(at)gmail.com>
To: "kis-list(at)matronics.com" <kis-list(at)matronics.com>
Sent: Wednesday, April 6, 2016 4:56 PM
Subject: Re: fairing ?
[img]cid:sSsvjupMtFfBPEEjYfEE[/img]Sent from my iPhone
On Apr 6, 2016, at 5:25 PM, Robert Reed <robertr237(at)att.net (robertr237(at)att.net)> wrote:
| Quote: | Al,
Sorry to take so long getting back to you, I was out of town visiting my mother for her 90th birthday. Wish I could say it was a joyful visit but her health is failing fast.
What stage am I at? Well, mostly I am at the stage where life keeps getting in the way of my hobbies.
Seriously, I am at the state of complete frustration trying to get the plane painted. I spent a huge amount of time sanding and prepping before finally putting on several coats of sandable primer, sanding that and finally applying the finish coats only to have the finish coats peel off. It seems that the time between the primer, sanding, and final coats was too long (weeks to months) and the paint did not bond. As a result, I had to totally strip the plane down to the glass and start over. I have tried to find someone locally to paint it but there is nobody at my airport that can do it and the only sources I have found are several hours drive away and want both arms and legs along with my first born child (between $15000 and $20000) to paint it. All also claimed a 6 month to year waiting time. (Gawd, I wish I were back in Houston, we had a great paint shop right on the field.)
So, I have decided to do it myself AGAIN. This time though, I am going to use a different paint and will spray it myself. I am using the PTI paint system from Aircraft Spruce and will apply with an HVLP Turbine Sprayer. Since I don't have access to a professional spray booth I have purchased a 12 x 27 canopy carport from King Canopy and have wrapped it in 6 mil clear plastic. I will utilize that as a paint booth. I am using the 4-stage Sprayfine HVLP turbine spray system with a forced air respiratory system for breathing. Will be using the paint booth at home configured as 12 x 20 for wings and small parts then reinstall at hangar (open T-hangar) for painting the fuselage. All I need now is some consistently warm weather so I can get the sanding, priming, and final coats done in two consecutive days.
Once painted I will finalize the electrical, assemble, and be ready for first engine start. All glass work is done and the only remaining things to purchase are the panel components. So close and yet so far.
Bob Reed
PS: Al, a word of caution regarding the installation of the wing fairings. The fairings must be fitted after you have at least test fit the wing, set the wing angle, and locked in the position of the rear wing root. In your case the flaps will not need to be installed but for others they would be. Fit the upper fairing to get a smooth fit over the wing all the way back and bond trying NOT to put any stress on the fairing as you do so, otherwise gaps will develop between the wing and the fairing. If I recall correctly, you put a step area on the inner portion of the wing with the flaps being out from that so the lower fairing will fit differently from the standard and can be installed totally different from the normal. It will also warp some if you aren't really careful in the bonding phase.
From: Alfred Rosa <fredorosa(at)gmail.com (fredorosa(at)gmail.com)> To: "kis-list(at)matronics.com (kis-list(at)matronics.com)" <kis-list(at)matronics.com (kis-list(at)matronics.com)> Sent: Monday, April 4, 2016 4:36 PM Subject: Re: KIS-List: fairing ?
--> KIS-List message posted by: Alfred Rosa <fredorosa(at)gmail.com (fredorosa(at)gmail.com)>Thanks Bob. That makes sense. I'll check your web site. What stage are you at?Sent from my iPhone> On Apr 4, 2016, at 5:25 PM, Robert Reed <robertr237(at)att.net (robertr237(at)att.net)> wrote:> > --> KIS-List message posted by: Robert Reed <robertr237(at)att.net (robertr237(at)att.net)>> > Al,> > The assembly shown is the bottom fairing which matches up to the top fairing at the back. The flat edge bonds to the underside of upper fairing and the curve mates to the upper fairing. There are some photos on my website in the Pre-assembly wing section. They aren't great shots but hopefully will give you an idea. > > Bob Reed> > Sent from my iPad> >> On Apr 4, 2016, at 1:28 PM, Alfred Rosa <fredorosa(at)gmail.com (fredorosa(at)gmail.com)> wrote:>> >> Hi all, I'm in the process of installing wing fairings on the Cruiser.>> The top fairing is self explanatory but I don't know what to do with the two fairing>> shapes left over.>> Can anyone tell me what these are and where they go. Also, since the manual doesn't give much info on the bottom fairings can someone provide a picture how they handled that?>> >> Al Rosa>> <IMG_0615.jpg>> > > > http://www.matronics.com/Navisp; - MATRONICS WEB FORUMS -= --> http
|
| | - The Matronics KIS-List Email Forum - | | | Use the List Feature Navigator to browse the many List utilities available such as the Email Subscriptions page, Archive Search & Download, 7-Day Browse, Chat, FAQ, Photoshare, and much more:
http://www.matronics.com/Navigator?KIS-List |
|
| Description: |
|
| Filesize: |
75.77 KB |
| Viewed: |
11933 Time(s) |
|
|
|
| Back to top |
|
|
fredorosa(at)gmail.com
Guest
|
| Posted: Wed Apr 06, 2016 2:43 pm Post subject: fairing ? |
|
|
Bob,
I have the wings attached while installing the fairings. I needed to cut a notch in the bottom rear fairing to accommodate the step. Fits together nicely.
there is one more larger bottom fairing that I have. Is that the last piece?
20,000. for a paint job.  that's comical. Just do a section first before doing the whole thing. Then if your not satisfied there wont be that much to strip.
I'll be doing it with HVLP and water based paint.
By the way, Â my mother turns 98 this August.
Thanks,
Al
On Wed, Apr 6, 2016 at 5:25 PM, Robert Reed <robertr237(at)att.net (robertr237(at)att.net)> wrote:
| Quote: | Al,
Sorry to take so long getting back to you, I was out of town visiting my mother for her 90th birthday. Wish I could say it was a joyful visit but her health is failing fast.
What stage am I at? Well, mostly I am at the stage where life keeps getting in the way of my hobbies.
Seriously, I am at the state of complete frustration trying to get the plane painted. I spent a huge amount of time sanding and prepping before finally putting on several coats of sandable primer, sanding that and finally applying the finish coats only to have the finish coats peel off. It seems that the time between the primer, sanding, and final coats was too long (weeks to months) and the paint did not bond. As a result, I had to totally strip the plane down to the glass and start over. I have tried to find someone locally to paint it but there is nobody at my airport that can do it and the only sources I have found are several hours drive away and want both arms and legs along with my first born child (between $15000 and $20000) to paint it. All also claimed a 6 month to year waiting time. (Gawd, I wish I were back in Houston, we had a great paint shop right on the field.)
So, I have decided to do it myself AGAIN. This time though, I am going to use a different paint and will spray it myself. I am using the PTI paint system from Aircraft Spruce and will apply with an HVLP Turbine Sprayer. Since I don't have access to a professional spray booth I have purchased a 12 x 27 canopy carport from King Canopy and have wrapped it in 6 mil clear plastic. I will utilize that as a paint booth. I am using the 4-stage Sprayfine HVLP turbine spray system with a forced air respiratory system for breathing. Will be using the paint booth at home configured as 12 x 20 for wings and small parts then reinstall at hangar (open T-hangar) for painting the fuselage. All I need now is some consistently warm weather so I can get the sanding, priming, and final coats done in two consecutive days.Â
Once painted I will finalize the electrical, assemble, and be ready for first engine start. All glass work is done and the only remaining things to purchase are the panel components. So close and yet so far.
Bob Reed
PS: Al, a word of caution regarding the installation of the wing fairings. The fairings must be fitted after you have at least test fit the wing, set the wing angle, and locked in the position of the rear wing root. In your case the flaps will not need to be installed but for others they would be. Fit the upper fairing to get a smooth fit over the wing all the way back and bond trying NOT to put any stress on the fairing as you do so, otherwise gaps will develop between the wing and the fairing. If I recall correctly, you put a step area on the inner portion of the wing with the flaps being out from that so the lower fairing will fit differently from the standard and can be installed totally different from the normal. It will also warp some if you aren't really careful in the bonding phase.
From: Alfred Rosa <fredorosa(at)gmail.com (fredorosa(at)gmail.com)>
To: "kis-list(at)matronics.com (kis-list(at)matronics.com)" <kis-list(at)matronics.com (kis-list(at)matronics.com)>
Sent: Monday, April 4, 2016 4:36 PM
Subject: Re: KIS-List: fairing ?
--> KIS-List message posted by: Alfred Rosa <fredorosa(at)gmail.com (fredorosa(at)gmail.com)>
Thanks Bob. That makes sense. I'll check your web site.
What stage are you at?
Sent from my iPhone
| Quote: | On Apr 4, 2016, at 5:25 PM, Robert Reed <robertr237(at)att.net (robertr237(at)att.net)> wrote:
--> KIS-List message posted by: Robert Reed <robertr237(at)att.net (robertr237(at)att.net)>
Al,
The assembly shown is the bottom fairing which matches up to the top fairing at the back. The flat edge bonds to the underside of upper fairing and the curve mates to the upper fairing. There are some photos on my website in the Pre-assembly wing section. They aren't great shots but hopefully will give you an idea.Â
Bob Reed
Sent from my iPad
> On Apr 4, 2016, at 1:28 PM, Alfred Rosa <fredorosa(at)gmail.com (fredorosa(at)gmail.com)> wrote:
>
> Hi all, I'm in the process of installing wing fairings on the Cruiser.
> The top fairing is self explanatory but I don't know what to do with the two fairing
> shapes left over.
> Can anyone tell me what these are and where they go. Also, since the manual doesn't give much info on the bottom fairings can someone provide a picture how they handled that?
>
> Al Rosa
> <IMG_0615.jpg>
http://www.matronics.com/Navisp; Â Â Â Â Â Â - MATRONICS WEB FORUMS -
=Â --> http
|
|
| | - The Matronics KIS-List Email Forum - | | | Use the List Feature Navigator to browse the many List utilities available such as the Email Subscriptions page, Archive Search & Download, 7-Day Browse, Chat, FAQ, Photoshare, and much more:
http://www.matronics.com/Navigator?KIS-List |
|
|
|
| Back to top |
|
|
randy.ott(at)gmail.com
Guest
|
| Posted: Wed Apr 06, 2016 2:52 pm Post subject: fairing ? |
|
|
I had the same issue at times with lifting paint ... I had half a plane in primer and half a plane in old deteriorating paint .  The primer did great but I did lift some of the old paint from time to Time ... But the good thing is when u mess up just pull it off and start that section over again !


After you get practiced up u can lay it down pretty efficiently !  Use a temp controlled heat gun , practice and be patient .


It does protect against uv ....


Randy

Sent from my iPhone


[quote] On Apr 6, 2016, at 6:08 PM, Robert Reed <robertr237(at)att.net> wrote:


 Randy,


 You have my absolute admiration for being able to vinyl wrap your plane.  Yes, I did consider the vinyl wrap route after the initial disaster with painting my fuselage.  I decided to try to wrap my ailerons first and it was a total cluster.  I had already painted the parts and was told they needed to be painted before application of the vinyl.  Started applying the vinyl and got one side on pretty well but then I got a wrinkle and needed to reposition the vinyl once on the second side.  I had not pressed it down yet so I Pulled it away from the part and the paint came off with the vinyl.  Had to remove it all and that's when I realized that I would have to strip everything.  I wasn't convinced the unpainted parts would be protected from UV without the paint and I was having a fit trying to deal with the vinyl application on the loose parts.


 I retained most of the vinyl that I bought and will use it for the color trim.  I am also considering using a strip of the white for application to the leading edge of the wing.


 Bob


 From: Randy Ott <randy.ott(at)gmail.com>

 To: "kis-list(at)matronics.com" <kis-list(at)matronics.com>

 Sent: Wednesday, April 6, 2016 4:50 PM

 Subject: Re: fairing ?


 Have you considered doing a vinyl wrap ???

 I wrapped my entire Velocity aircraft for under $2k in materials. ..and you can do it piecemeal .. So far it has held up fine to our 200 mph skip stream .  It's one year old and looks as good as it did the day I put it on .

 Let me know if you need help !

 Randy Ott

 KIS N 96BT

 Velocity N333RR


 Sent from my iPhone


> On Apr 6, 2016, at 5:25 PM, Robert Reed <robertr237(at)att.net> wrote:

>

> Al,

>

> Sorry to take so long getting back to you, I was out of town visiting my mother for her 90th birthday.  Wish I could say it was a joyful visit but her health is failing fast.

>

> What stage am I at?  Well, mostly I am at the stage where life keeps getting in the way of my hobbies.

>

> Seriously, I am at the state of complete frustration trying to get the plane painted.  I spent a huge amount of time sanding and prepping before finally putting on several coats of sandable primer, sanding that and finally applying the finish coats only to have the finish coats peel off.  It seems that the time between the primer, sanding, and final coats was too long (weeks to months) and the paint did not bond.  As a result, I had to totally strip the plane down to the glass and start over.  I have tried to find someone locally to paint it but there is nobody at my airport that can do it and the only sources I have found are several hours drive away and want both arms and legs along with my first born child (between $15000 and $20000) to paint it.  All also claimed a 6 month to year waiting time.  (Gawd, I wish I were back in Houston, we had a great paint shop right on the field.)

>

> So, I have decided to do it myself AGAIN.  This time though, I am going to use a different paint and will spray it myself.  I am using the PTI paint system from Aircraft Spruce and will apply with an HVLP Turbine Sprayer.  Since I don't have access to a professional spray booth I have purchased a 12 x 27 canopy carport from King Canopy and have wrapped it in 6 mil clear plastic.  I will utilize that as a paint booth.  I am using the 4-stage Sprayfine HVLP turbine spray system with a forced air respiratory system for breathing.  Will be using the paint booth at home configured as 12 x 20 for wings and small parts then reinstall at hangar (open T-hangar) for painting the fuselage.  All I need now is some consistently warm weather so I can get the sanding, priming, and final coats done in two consecutive days.

>

> Once painted I will finalize the electrical, assemble, and be ready for first engine start.  All glass work is done and the only remaining things to purchase are the panel components.  So close and yet so far.

>

> Bob Reed

>

>

> PS:  Al, a word of caution regarding the installation of the wing fairings.  The fairings must be fitted after you have at least test fit the wing, set the wing angle, and locked in the position of the rear wing root.  In your case the flaps will not need to be installed but for others they would be.  Fit the upper fairing to get a smooth fit over the wing all the way back and bond trying NOT to put any stress on the fairing as you do so, otherwise gaps will develop between the wing and the fairing.  If I recall correctly, you put a step area on the inner portion of the wing with the flaps being out from that so the lower fairing will fit differently from the standard and can be installed totally different from the normal.  It will also warp some if you aren't really careful in the bonding phase.

>

> From: Alfred Rosa <fredorosa(at)gmail.com>

> To: "kis-list(at)matronics.com" <kis-list(at)matronics.com>

> Sent: Monday, April 4, 2016 4:36 PM

> Subject: Re: fairing ?

>

>

>

> Thanks Bob.  That makes sense.  I'll check your web site.

> What stage are you at?

>

> Sent from my iPhone

>

> > On Apr 4, 2016, at 5:25 PM, Robert Reed <robertr237(at)att.net> wrote:

> >

> >

> >

> > Al,

> >

> > The assembly shown is the bottom fairing which matches up to the top fairing at the back.  The flat edge bonds to the underside of upper fairing and the curve mates to the upper fairing. There are some photos on my website in the Pre-assembly wing section. They aren't great shots but hopefully will give you an idea.

> >

> > Bob Reed

> >

> > Sent from my iPad

> >

> >> On Apr 4, 2016, at 1:28 PM, Alfred Rosa <fredorosa(at)gmail.com> wrote:

> >>

> >> Hi all,  I'm in the process of installing wing fairings on the Cruiser
| | - The Matronics KIS-List Email Forum - | | | Use the List Feature Navigator to browse the many List utilities available such as the Email Subscriptions page, Archive Search & Download, 7-Day Browse, Chat, FAQ, Photoshare, and much more:
http://www.matronics.com/Navigator?KIS-List |
|
|
|
| Back to top |
|
|
randy.ott(at)gmail.com
Guest
|
| Posted: Wed Apr 06, 2016 2:53 pm Post subject: fairing ? |
|
|
I wouldn't give up yet !


Sent from my iPhone


[quote] On Apr 6, 2016, at 6:08 PM, Robert Reed <robertr237(at)att.net> wrote:


 Randy,


 You have my absolute admiration for being able to vinyl wrap your plane.  Yes, I did consider the vinyl wrap route after the initial disaster with painting my fuselage.  I decided to try to wrap my ailerons first and it was a total cluster.  I had already painted the parts and was told they needed to be painted before application of the vinyl.  Started applying the vinyl and got one side on pretty well but then I got a wrinkle and needed to reposition the vinyl once on the second side.  I had not pressed it down yet so I Pulled it away from the part and the paint came off with the vinyl.  Had to remove it all and that's when I realized that I would have to strip everything.  I wasn't convinced the unpainted parts would be protected from UV without the paint and I was having a fit trying to deal with the vinyl application on the loose parts.


 I retained most of the vinyl that I bought and will use it for the color trim.  I am also considering using a strip of the white for application to the leading edge of the wing.


 Bob


 From: Randy Ott <randy.ott(at)gmail.com>

 To: "kis-list(at)matronics.com" <kis-list(at)matronics.com>

 Sent: Wednesday, April 6, 2016 4:50 PM

 Subject: Re: fairing ?


 Have you considered doing a vinyl wrap ???

 I wrapped my entire Velocity aircraft for under $2k in materials. ..and you can do it piecemeal .. So far it has held up fine to our 200 mph skip stream .  It's one year old and looks as good as it did the day I put it on .

 Let me know if you need help !

 Randy Ott

 KIS N 96BT

 Velocity N333RR


 Sent from my iPhone


> On Apr 6, 2016, at 5:25 PM, Robert Reed <robertr237(at)att.net> wrote:

>

> Al,

>

> Sorry to take so long getting back to you, I was out of town visiting my mother for her 90th birthday.  Wish I could say it was a joyful visit but her health is failing fast.

>

> What stage am I at?  Well, mostly I am at the stage where life keeps getting in the way of my hobbies.

>

> Seriously, I am at the state of complete frustration trying to get the plane painted.  I spent a huge amount of time sanding and prepping before finally putting on several coats of sandable primer, sanding that and finally applying the finish coats only to have the finish coats peel off.  It seems that the time between the primer, sanding, and final coats was too long (weeks to months) and the paint did not bond.  As a result, I had to totally strip the plane down to the glass and start over.  I have tried to find someone locally to paint it but there is nobody at my airport that can do it and the only sources I have found are several hours drive away and want both arms and legs along with my first born child (between $15000 and $20000) to paint it.  All also claimed a 6 month to year waiting time.  (Gawd, I wish I were back in Houston, we had a great paint shop right on the field.)

>

> So, I have decided to do it myself AGAIN.  This time though, I am going to use a different paint and will spray it myself.  I am using the PTI paint system from Aircraft Spruce and will apply with an HVLP Turbine Sprayer.  Since I don't have access to a professional spray booth I have purchased a 12 x 27 canopy carport from King Canopy and have wrapped it in 6 mil clear plastic.  I will utilize that as a paint booth.  I am using the 4-stage Sprayfine HVLP turbine spray system with a forced air respiratory system for breathing.  Will be using the paint booth at home configured as 12 x 20 for wings and small parts then reinstall at hangar (open T-hangar) for painting the fuselage.  All I need now is some consistently warm weather so I can get the sanding, priming, and final coats done in two consecutive days.

>

> Once painted I will finalize the electrical, assemble, and be ready for first engine start.  All glass work is done and the only remaining things to purchase are the panel components.  So close and yet so far.

>

> Bob Reed

>

>

> PS:  Al, a word of caution regarding the installation of the wing fairings.  The fairings must be fitted after you have at least test fit the wing, set the wing angle, and locked in the position of the rear wing root.  In your case the flaps will not need to be installed but for others they would be.  Fit the upper fairing to get a smooth fit over the wing all the way back and bond trying NOT to put any stress on the fairing as you do so, otherwise gaps will develop between the wing and the fairing.  If I recall correctly, you put a step area on the inner portion of the wing with the flaps being out from that so the lower fairing will fit differently from the standard and can be installed totally different from the normal.  It will also warp some if you aren't really careful in the bonding phase.

>

> From: Alfred Rosa <fredorosa(at)gmail.com>

> To: "kis-list(at)matronics.com" <kis-list(at)matronics.com>

> Sent: Monday, April 4, 2016 4:36 PM

> Subject: Re: fairing ?

>

>

>

> Thanks Bob.  That makes sense.  I'll check your web site.

> What stage are you at?

>

> Sent from my iPhone

>

> > On Apr 4, 2016, at 5:25 PM, Robert Reed <robertr237(at)att.net> wrote:

> >

> >

> >

> > Al,

> >

> > The assembly shown is the bottom fairing which matches up to the top fairing at the back.  The flat edge bonds to the underside of upper fairing and the curve mates to the upper fairing. There are some photos on my website in the Pre-assembly wing section. They aren't great shots but hopefully will give you an idea.

> >

> > Bob Reed

> >

> > Sent from my iPad

> >

> >> On Apr 4, 2016, at 1:28 PM, Alfred Rosa <fredorosa(at)gmail.com> wrote:

> >>

> >> Hi all,  I'm in the process of installing wing fairings on the Cruiser
| | - The Matronics KIS-List Email Forum - | | | Use the List Feature Navigator to browse the many List utilities available such as the Email Subscriptions page, Archive Search & Download, 7-Day Browse, Chat, FAQ, Photoshare, and much more:
http://www.matronics.com/Navigator?KIS-List |
|
|
|
| Back to top |
|
|
Robert Reed
Joined: 22 Oct 2009
Posts: 331
Location: Dallas/Ft.Worth
|
| Posted: Wed Apr 06, 2016 2:58 pm Post subject: fairing ? |
|
|
Al,
It wasn't until today that I remembered the modification you had made to your wing and flaps so I knew there would be some difference. I believe the remaining part you are talking about is a flat skin section that had a curl up at one end that fits into the leading edge curl of the upper fairing. There should be two of those. The back end should have tabs installed to fit and mate with the rear fairing you just installed. You will also need to use some screws to retain that piece since it should be removable to give access to the wing connections. I also have a piece for screw attachment that covers the landing gear on the bottom.
$20k for a paint job was more than comical especially when I had already done all of the hard work and all of the parts were off the plane. Agreed, I will work my way from the smaller parts up to the fuselage as the last part. By then I will hopefully will have that HVLP sprayer use under control. I used water based paints on my first attempt and wasn't happy with how sensitive they were to both temperature and humidity levels. They also seemed to flash off too quickly or would run. Probably the painter and not the paint though.
98....WOW! That is great. Sad to say that my mom won't make it that long but she has had a good life and a hard life.
Bob
From: Alfred Rosa <fredorosa(at)gmail.com>
To: kisbuilders <kis-list(at)matronics.com>
Sent: Wednesday, April 6, 2016 5:42 PM
Subject: Re: fairing ?
Bob,
I have the wings attached while installing the fairings. I needed to cut a notch in the bottom rear fairing to accommodate the step. Fits together nicely.
there is one more larger bottom fairing that I have. Is that the last piece?
20,000. for a paint job. that's comical. Just do a section first before doing the whole thing. Then if your not satisfied there wont be that much to strip.
I'll be doing it with HVLP and water based paint.
By the way, my mother turns 98 this August.
Thanks,
Al
On Wed, Apr 6, 2016 at 5:25 PM, Robert Reed <robertr237(at)att.net (robertr237(at)att.net)> wrote: | Quote: | Al,
Sorry to take so long getting back to you, I was out of town visiting my mother for her 90th birthday. Wish I could say it was a joyful visit but her health is failing fast.
What stage am I at? Well, mostly I am at the stage where life keeps getting in the way of my hobbies.
Seriously, I am at the state of complete frustration trying to get the plane painted. I spent a huge amount of time sanding and prepping before finally putting on several coats of sandable primer, sanding that and finally applying the finish coats only to have the finish coats peel off. It seems that the time between the primer, sanding, and final coats was too long (weeks to months) and the paint did not bond. As a result, I had to totally strip the plane down to the glass and start over. I have tried to find someone locally to paint it but there is nobody at my airport that can do it and the only sources I have found are several hours drive away and want both arms and legs along with my first born child (between $15000 and $20000) to paint it. All also claimed a 6 month to year waiting time. (Gawd, I wish I were back in Houston, we had a great paint shop right on the field.)
So, I have decided to do it myself AGAIN. This time though, I am going to use a different paint and will spray it myself. I am using the PTI paint system from Aircraft Spruce and will apply with an HVLP Turbine Sprayer. Since I don't have access to a professional spray booth I have purchased a 12 x 27 canopy carport from King Canopy and have wrapped it in 6 mil clear plastic. I will utilize that as a paint booth. I am using the 4-stage Sprayfine HVLP turbine spray system with a forced air respiratory system for breathing. Will be using the paint booth at home configured as 12 x 20 for wings and small parts then reinstall at hangar (open T-hangar) for painting the fuselage. All I need now is some consistently warm weather so I can get the sanding, priming, and final coats done in two consecutive days.
Once painted I will finalize the electrical, assemble, and be ready for first engine start. All glass work is done and the only remaining things to purchase are the panel components. So close and yet so far.
Bob Reed
PS: Al, a word of caution regarding the installation of the wing fairings. The fairings must be fitted after you have at least test fit the wing, set the wing angle, and locked in the position of the rear wing root. In your case the flaps will not need to be installed but for others they would be. Fit the upper fairing to get a smooth fit over the wing all the way back and bond trying NOT to put any stress on the fairing as you do so, otherwise gaps will develop between the wing and the fairing. If I recall correctly, you put a step area on the inner portion of the wing with the flaps being out from that so the lower fairing will fit differently from the standard and can be installed totally different from the normal. It will also warp some if you aren't really careful in the bonding phase.
From: Alfred Rosa <fredorosa(at)gmail.com (fredorosa(at)gmail.com)> To: "kis-list(at)matronics.com (kis-list(at)matronics.com)" <kis-list(at)matronics.com (kis-list(at)matronics.com)> Sent: Monday, April 4, 2016 4:36 PM Subject: Re: fairing ?
--> KIS-List message posted by: Alfred Rosa <fredorosa(at)gmail.com (fredorosa(at)gmail.com)>Thanks Bob. That makes sense. I'll check your web site. What stage are you at?Sent from my iPhone> On Apr 4, 2016, at 5:25 PM, Robert Reed <robertr237(at)att.net (robertr237(at)att.net)> wrote:> > --> KIS-List message posted by: Robert Reed <robertr237(at)att.net (robertr237(at)att.net)>> > Al,> > The assembly shown is the bottom fairing which matches up to the top fairing at the back. The flat edge bonds to the underside of upper fairing and the curve mates to the upper fairing. There are some photos on my website in the Pre-assembly wing section. They aren't great shots but hopefully will give you an idea. > > Bob Reed> > Sent from my iPad> >> On Apr 4, 2016, at 1:28 PM, Alfred Rosa <fredorosa(at)gmail.com (fredorosa(at)gmail.com)> wrote:>> >> Hi all, I'm in the process of installing wing fairings on the Cruiser.>> The top fairing is self explanatory but I don't know what to do with the two fairing>> shapes left over.>> Can anyone tell me what these are and where they go. Also, since the manual doesn't give much info on the bottom fairings can someone provide a picture how they handled that?>> >> Al Rosa>> <IMG_0615.jpg>> > > > http://www.matronics.com/Navisp; - MATRONICS WEB FORUMS -= --> http
|
| | - The Matronics KIS-List Email Forum - | | | Use the List Feature Navigator to browse the many List utilities available such as the Email Subscriptions page, Archive Search & Download, 7-Day Browse, Chat, FAQ, Photoshare, and much more:
http://www.matronics.com/Navigator?KIS-List |
|
|
|
| Back to top |
|
|
randy.ott(at)gmail.com
Guest
|
| Posted: Wed Apr 06, 2016 6:19 pm Post subject: fairing ? |
|
|
Thank you for the Velocity compliment!  But I gotta tell you ... I so loved my KIS !

I am still trying to find a new home for her!  I'm dropping the price every month untill some lucky person bites ..... It's at $42k right now ....

Sent from my iPhone


[quote] On Apr 6, 2016, at 6:13 PM, Robert Reed <robertr237(at)att.net> wrote:


 GREAT JOB!  It really looks good, beautiful plane.


 Bob


 PS:  Beautiful pilot too!


 From: Randy Ott <randy.ott(at)gmail.com>

 To: "kis-list(at)matronics.com" <kis-list(at)matronics.com>

 Sent: Wednesday, April 6, 2016 5:00 PM

 Subject: Re: fairing ?


 <image1.jpeg>

 I did this all by my self ... With no prior experience in vinyl work !

 Sent from my iPhone


> On Apr 6, 2016, at 5:25 PM, Robert Reed <robertr237(at)att.net> wrote:

>

> Al,

>

> Sorry to take so long getting back to you, I was out of town visiting my mother for her 90th birthday.  Wish I could say it was a joyful visit but her health is failing fast.

>

> What stage am I at?  Well, mostly I am at the stage where life keeps getting in the way of my hobbies.

>

> Seriously, I am at the state of complete frustration trying to get the plane painted.  I spent a huge amount of time sanding and prepping before finally putting on several coats of sandable primer, sanding that and finally applying the finish coats only to have the finish coats peel off.  It seems that the time between the primer, sanding, and final coats was too long (weeks to months) and the paint did not bond.  As a result, I had to totally strip the plane down to the glass and start over.  I have tried to find someone locally to paint it but there is nobody at my airport that can do it and the only sources I have found are several hours drive away and want both arms and legs along with my first born child (between $15000 and $20000) to paint it.  All also claimed a 6 month to year waiting time.  (Gawd, I wish I were back in Houston, we had a great paint shop right on the field.)

>

> So, I have decided to do it myself AGAIN.  This time though, I am going to use a different paint and will spray it myself.  I am using the PTI paint system from Aircraft Spruce and will apply with an HVLP Turbine Sprayer.  Since I don't have access to a professional spray booth I have purchased a 12 x 27 canopy carport from King Canopy and have wrapped it in 6 mil clear plastic.  I will utilize that as a paint booth.  I am using the 4-stage Sprayfine HVLP turbine spray system with a forced air respiratory system for breathing.  Will be using the paint booth at home configured as 12 x 20 for wings and small parts then reinstall at hangar (open T-hangar) for painting the fuselage.  All I need now is some consistently warm weather so I can get the sanding, priming, and final coats done in two consecutive days.

>

> Once painted I will finalize the electrical, assemble, and be ready for first engine start.  All glass work is done and the only remaining things to purchase are the panel components.  So close and yet so far.

>

> Bob Reed

>

>

> PS:  Al, a word of caution regarding the installation of the wing fairings.  The fairings must be fitted after you have at least test fit the wing, set the wing angle, and locked in the position of the rear wing root.  In your case the flaps will not need to be installed but for others they would be.  Fit the upper fairing to get a smooth fit over the wing all the way back and bond trying NOT to put any stress on the fairing as you do so, otherwise gaps will develop between the wing and the fairing.  If I recall correctly, you put a step area on the inner portion of the wing with the flaps being out from that so the lower fairing will fit differently from the standard and can be installed totally different from the normal.  It will also warp some if you aren't really careful in the bonding phase.

>

> From: Alfred Rosa <fredorosa(at)gmail.com>

> To: "kis-list(at)matronics.com" <kis-list(at)matronics.com>

> Sent: Monday, April 4, 2016 4:36 PM

> Subject: Re: fairing ?

>

>

>

> Thanks Bob.  That makes sense.  I'll check your web site.

> What stage are you at?

>

> Sent from my iPhone

>

> > On Apr 4, 2016, at 5:25 PM, Robert Reed <robertr237(at)att.net> wrote:

> >

> >

> >

> > Al,

> >

> > The assembly shown is the bottom fairing which matches up to the top fairing at the back.  The flat edge bonds to the underside of upper fairing and the curve mates to the upper fairing. There are some photos on my website in the Pre-assembly wing section. They aren't great shots but hopefully will give you an idea.

> >

> > Bob Reed

> >

> > Sent from my iPad

> >

> >> On Apr 4, 2016, at 1:28 PM, Alfred Rosa <fredorosa(at)gmail.com> wrote:

> >>

> >> Hi all,  I'm in the process of installing wing fairings on the Cruiser
| | - The Matronics KIS-List Email Forum - | | | Use the List Feature Navigator to browse the many List utilities available such as the Email Subscriptions page, Archive Search & Download, 7-Day Browse, Chat, FAQ, Photoshare, and much more:
http://www.matronics.com/Navigator?KIS-List |
|
|
|
| Back to top |
|
|
wschertz343(at)gmail.com
Guest
|
| Posted: Thu Apr 07, 2016 6:05 am Post subject: fairing ? |
|
|
Bob,
It sounds like you are on track to be able to paint it yourself. I found a painter that came to my hanger and did the painting â very nice job, for $5000. His business model is painting at the customers location. He is located in Indiana, but I know that he actually travels around (did some jobs in AZ). You might give him a call on a long shot if you run into obstacles in painting it yourself.
Rick Billbe
Covington, IN 47932
765-585-3263
765-585-5118
| | - The Matronics KIS-List Email Forum - | | | Use the List Feature Navigator to browse the many List utilities available such as the Email Subscriptions page, Archive Search & Download, 7-Day Browse, Chat, FAQ, Photoshare, and much more:
http://www.matronics.com/Navigator?KIS-List |
|
|
|
| Back to top |
|
|
jerzy_krasinski(at)sbcglo
Guest
|
| Posted: Thu Apr 07, 2016 6:53 am Post subject: fairing ? |
|
|
Alfred and Robert,
Painting my plane I discovered that all talking about "special" aircraft paint is a hogwash.
I bought one of those super paints, The paint was made by Poly- something company and it was heavily advertised as the best thing ever. It was water based, terribly running down while painting and peeling off off right away.
I had to strip everything and I had a talk with an expert.
Educated by theory and experiment I bought regular automotive paint. Its very poisonous if you get the spray droplets in your lungs or eyes, but the isocyanates have low vapor pressure so there is not much vapor to worry about.
I made a tunnel like structure out of plastic foil suspended on light wooden frame. I installed a large blower on the exhaust side and large airconditoning filters (to keep the bugs away) on the inlet.
I painted things one after another inside that "wind" tunnel".
I used a good filtered mask covering whole mouth and eyes, making sure that I don't get on the downwind side of the spray.
No problems with paint running down. No problems with peeling, . Excellent surface and no problems with paint deterioration during 10 years of exploitation. And no $20k required
It took me two years to make and paint the plane.
The sad part was that it took me another two years to make fuel, brakes and electrical/instruments installation,working for a few hours every day and working weekends like in a labor camp.
The progress does not seem to depend much on the size of the objects.
It really depends on the number of tasks.
Installing tiny things takes as much time as handling big elements
Jerzy
On Wednesday, April 6, 2016 5:22 PM, Robert Reed <robertr237(at)att.net> wrote:
GREAT JOB! It really looks good, beautiful plane.
Bob
PS: Beautiful pilot too!
From: Randy Ott <randy.ott(at)gmail.com> To: "kis-list(at)matronics.com" <kis-list(at)matronics.com> Sent: Wednesday, April 6, 2016 5:00 PM Subject: Re: fairing ?
[img]cid:JW9M2FUB53cxzFl3oTNi[/img]I did this all by my self ... With no prior experience in vinyl work !Sent from my iPhone
On Apr 6, 2016, at 5:25 PM, Robert Reed <robertr237(at)att.net (robertr237(at)att.net)> wrote:
| Quote: | Al,
Sorry to take so long getting back to you, I was out of town visiting my mother for her 90th birthday. Wish I could say it was a joyful visit but her health is failing fast.
What stage am I at? Well, mostly I am at the stage where life keeps getting in the way of my hobbies.
Seriously, I am at the state of complete frustration trying to get the plane painted. I spent a huge amount of time sanding and prepping before finally putting on several coats of sandable primer, sanding that and finally applying the finish coats only to have the finish coats peel off. It seems that the time between the primer, sanding, and final coats was too long (weeks to months) and the paint did not bond. As a result, I had to totally strip the plane down to the glass and start over. I have tried to find someone locally to paint it but there is nobody at my airport that can do it and the only sources I have found are several hours drive away and want both arms and legs along with my first born child (between $15000 and $20000) to paint it. All also claimed a 6 month to year waiting time. (Gawd, I wish I were back in Houston, we had a great paint shop right on the field.)
So, I have decided to do it myself AGAIN. This time though, I am going to use a different paint and will spray it myself. I am using the PTI paint system from Aircraft Spruce and will apply with an HVLP Turbine Sprayer. Since I don't have access to a professional spray booth I have purchased a 12 x 27 canopy carport from King Canopy and have wrapped it in 6 mil clear plastic. I will utilize that as a paint booth. I am using the 4-stage Sprayfine HVLP turbine spray system with a forced air respiratory system for breathing. Will be using the paint booth at home configured as 12 x 20 for wings and small parts then reinstall at hangar (open T-hangar) for painting the fuselage. All I need now is some consistently warm weather so I can get the sanding, priming, and final coats done in two consecutive days.
Once painted I will finalize the electrical, assemble, and be ready for first engine start. All glass work is done and the only remaining things to purchase are the panel components. So close and yet so far.
Bob Reed
PS: Al, a word of caution regarding the installation of the wing fairings. The fairings must be fitted after you have at least test fit the wing, set the wing angle, and locked in the position of the rear wing root. In your case the flaps will not need to be installed but for others they would be. Fit the upper fairing to get a smooth fit over the wing all the way back and bond trying NOT to put any stress on the fairing as you do so, otherwise gaps will develop between the wing and the fairing. If I recall correctly, you put a step area on the inner portion of the wing with the flaps being out from that so the lower fairing will fit differently from the standard and can be installed totally different from the normal. It will also warp some if you aren't really careful in the bonding phase.
From: Alfred Rosa <fredorosa(at)gmail.com (fredorosa(at)gmail.com)> To: "kis-list(at)matronics.com (kis-list(at)matronics.com)" <kis-list(at)matronics.com (kis-list(at)matronics.com)> Sent: Monday, April 4, 2016 4:36 PM Subject: Re: fairing ?
--> KIS-List message posted by: Alfred Rosa <fredorosa(at)gmail.com (fredorosa(at)gmail.com)>Thanks Bob. That makes sense. I'll check your web site. What stage are you at?Sent from my iPhone> On Apr 4, 2016, at 5:25 PM, Robert Reed <robertr237(at)att.net (robertr237(at)att.net)> wrote:> > --> KIS-List message posted by: Robert Reed <robertr237(at)att.net (robertr237(at)att.net)>> > Al,> > The assembly shown is the bottom fairing which matches up to the top fairing at the back. The flat edge bonds to the underside of upper fairing and the curve mates to the upper fairing. There are some photos on my website in the Pre-assembly wing section. They aren't great shots but hopefully will give you an idea. > > Bob Reed> > Sent from my iPad> >> On Apr 4, 2016, at 1:28 PM, Alfred Rosa <fredorosa(at)gmail.com (fredorosa(at)gmail.com)> wrote:>> >> Hi all, I'm in the process of installing wing fairings on the Cruiser.>> The top fairing is self explanatory but I don't know what to do with the two fairing>> shapes left over.>> Can anyone tell me what these are and where they go. Also, since the manual doesn't give much info on the bottom fairings can someone provide a picture how they handled that?>> >> Al Rosa>> <IMG_0615.jpg>> > > > http://www.matronics.com/Navisp; - MATRONICS WEB FORUMS -= --> http
|
| | - The Matronics KIS-List Email Forum - | | | Use the List Feature Navigator to browse the many List utilities available such as the Email Subscriptions page, Archive Search & Download, 7-Day Browse, Chat, FAQ, Photoshare, and much more:
http://www.matronics.com/Navigator?KIS-List |
|
| Description: |
|
| Filesize: |
648.24 KB |
| Viewed: |
11930 Time(s) |
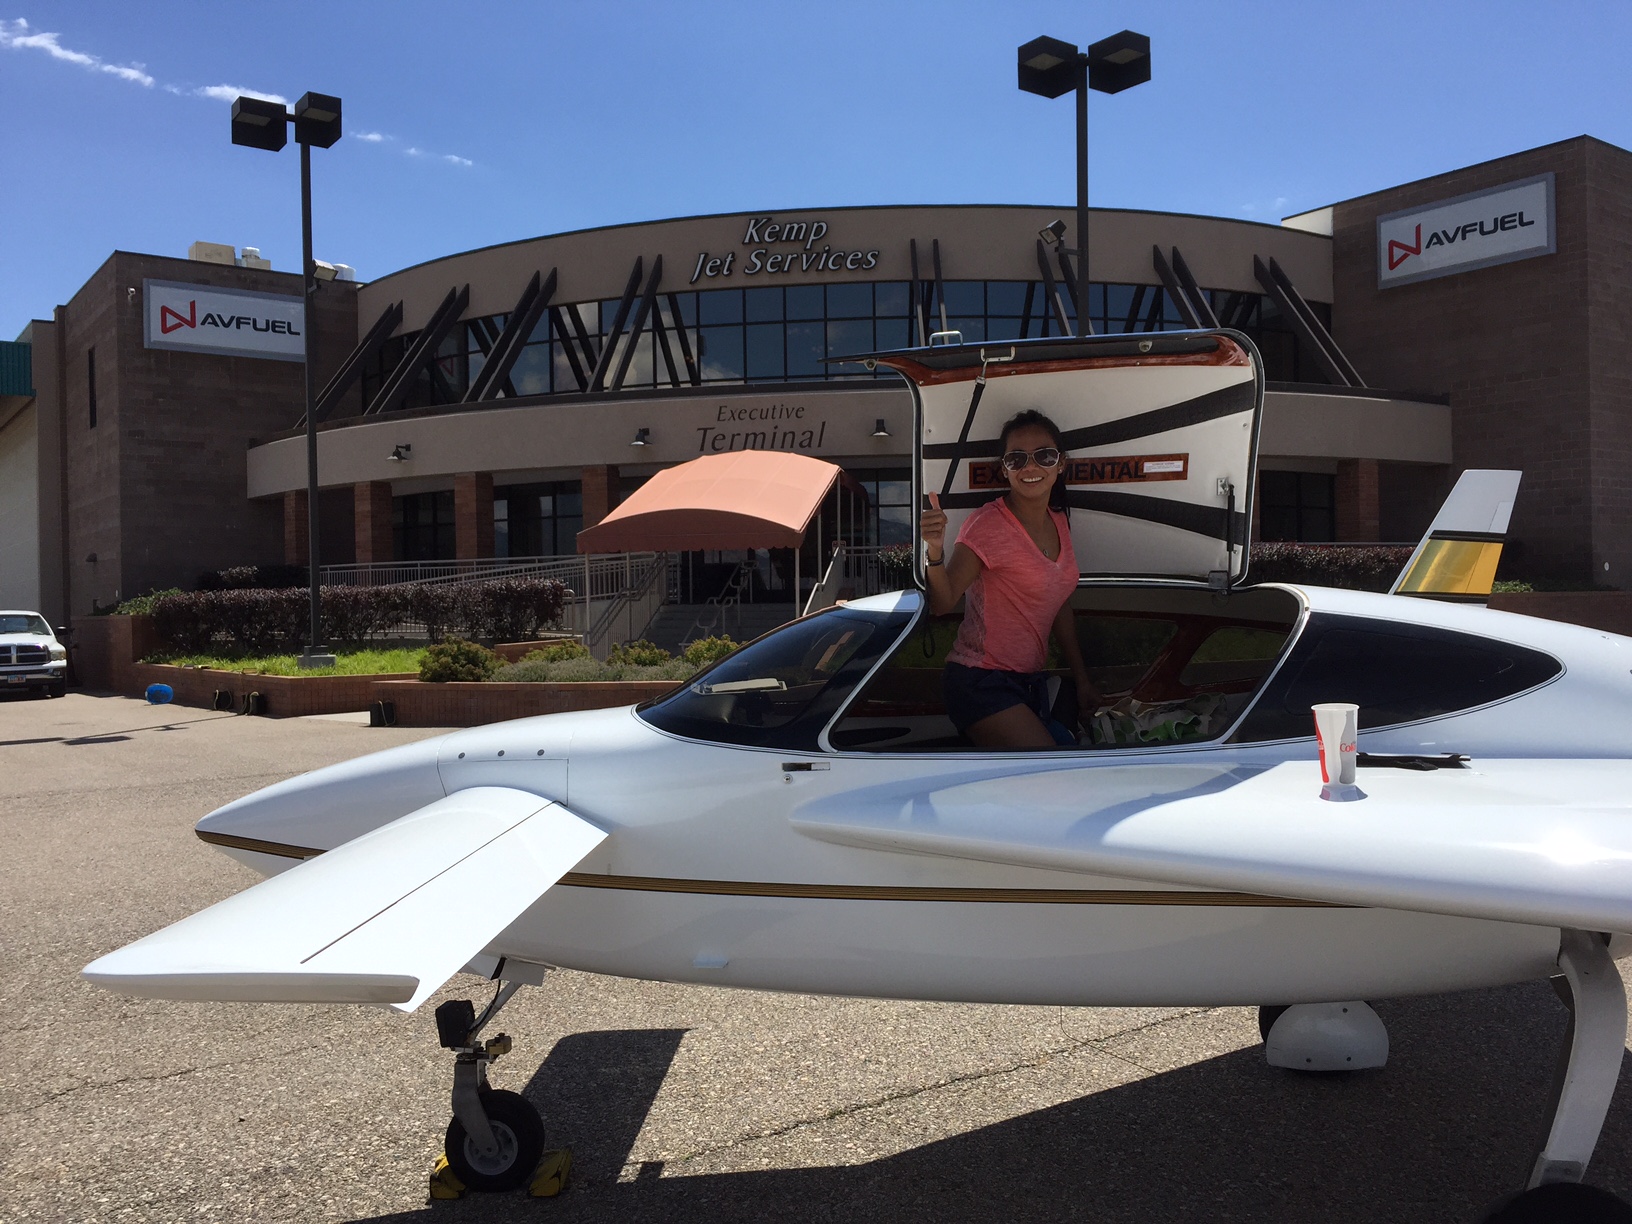
|
|
|
| Back to top |
|
|
Robert Reed
Joined: 22 Oct 2009
Posts: 331
Location: Dallas/Ft.Worth
|
| Posted: Thu Apr 07, 2016 7:56 am Post subject: fairing ? |
|
|
Jerzy,

I started out with the System 3 WR 155 Epoxy Primer and the System Three WR-LPU Polyurethane Topcoat, both of which are two part water based products that claim to go on with either a HVLP Spray or with the roll and tip application.  The Primer was absolutely GREAT to work with and went on exactly as advertised with either method, sanded beautifully, and produced a very smooth hard surface.  That though was where the "advertised" values stop dead in their tracks.  The WR-LPU topcoat might have been suitable for painting a boat but the finish was total crap for anything else.  I tried multiple times to spray it and like you experienced it would run every time. (Painted, stripped, and repainted the left wing 3 times)  I tried the very light tack coat and that ran too.  Finally, I tried the Roll and Tip which I was able to get coverage without the running problems but the paint did not flow out to produce a smooth finish and the light tip brush marks were always visible.  (The damn stuff would dry to the touch in just a couple of minutes)  I tried the most expensive and finest brushes and still marks.  I thinned it more and sprayed the shop down with wet floor and a humidifier to slow the set time. (The temperature and humidity requirements were critical to working with the paint with about a 10degree temp range and high humidity required.)   Didn't matter what I did, the brush marks remained.  Finally, I was just going to accept the flawed finish and go forward until I did the fuselage and the damn paint bubbled and peeled off in washcloth sized sheets. (Resulted from the temperature in the hangar dropping overnight and humidity went up.)  After that, I checked to see how well the paint was bonded to the other parts and found the same lack of bonding.

I did talk to a guy I know who works for one of the local auto dealerships and is the manager in their paint and body department.  Based on his comments about water based paints that they are forced to use, he would go with solvent based and the HVLP Turbine Spray which is what I am going to use.  The reason is that in their shop they can strictly control the environment in their paint booth and meet the narrow requirements for water based paints.  Similar to your experience Jerzy.  He also recommended that I use the sand able primer, apply multiple coats and sand until I was happy with the base then to use a base coat primer followed within 24-48 hours by the color coats.  This will allow the primer to form a strong physical bond and the top coat to form a chemical bond.  After reading the available information on the PTI Paint I got from AS, they basically said the same thing.

Sad to say that it has taken far more than two years to get the plane painted but with most of the plane being in a hangar an hours drive from my house and still working 10 hours a day, five days a week, the time to work on it has been very limited.  Combine the work schedule and dealing with both an ailing mother and mother-in-law, even the weekends to work on it were few and far between.  I hate to admit this but what started out as a fun hobby has turned into a dreaded work project.  At 69 and counting I don't seem to have the energy in the evenings or weekends to put in 8 hour days in the heat or cold working on it.  We are moving again in two years, after retirement, and I have to get it finished before then or just get rid of it one.

Bob


If I weren't so damn stubborn I would have sold it years ago.

       From: jerzy krasinski <jerzy_krasinski(at)sbcglobal.net>

 To: "kis-list(at)matronics.com" <kis-list(at)matronics.com>

 Sent: Thursday, April 7, 2016 9:52 AM

 Subject: Re: fairing ?


Alfred and Robert,


Painting my plane I discovered that all talking about "special" aircraft paint is a hogwash.

I bought one of those super paints, The paint was made by Poly- something company and it was  heavily advertised as the best thing ever. It was water based, terribly running down while painting and peeling off  off right away.


I had to strip everything and I had a talk with an expert.


Educated by theory and experiment I bought regular automotive paint. Its very poisonous if you get the spray droplets in your lungs or eyes, but the isocyanates have low vapor pressure so there is not much vapor to worry about.

I made a tunnel like structure out of plastic foil suspended on light wooden frame. I installed a large blower on the exhaust side and large airconditoning filters (to keep the bugs away) on the inlet.

I painted things one after another inside that "wind" tunnel".

I used a good filtered mask covering whole mouth and eyes, making sure that I don't get on the downwind side of the spray.

No problems with paint running down. No problems with peeling, . Excellent surface and no problems with paint deterioration during 10 years of exploitation. And no $20k required


It took me two years to make and paint the plane.


The sad part was that it took me another two years to make fuel, brakes and electrical/instruments installation,working for a few hours every day and working weekends like in a labor camp.

The progress does not seem to depend much on the size of the objects.

It really depends on the number of tasks.

Installing tiny things takes as much time as handling big elements


Jerzy
| | - The Matronics KIS-List Email Forum - | | | Use the List Feature Navigator to browse the many List utilities available such as the Email Subscriptions page, Archive Search & Download, 7-Day Browse, Chat, FAQ, Photoshare, and much more:
http://www.matronics.com/Navigator?KIS-List |
|
|
|
| Back to top |
|
|
Robert Reed
Joined: 22 Oct 2009
Posts: 331
Location: Dallas/Ft.Worth
|
| Posted: Thu Apr 07, 2016 8:09 am Post subject: fairing ? |
|
|
Hey Bill, long time no hear....glad you are still around.
How is your plane doing these days? About time you took a trip down Texas way.
Thanks for the contact name and number, if I can't get things worked out I will give him a call. I intend to try and paint my fuselage in the hangar but unlike your hangar mine is an open walled (above 8 ft.) T-hangar that doesn't even have enough power available to drive a decent portable compressor. I am planning on taking a week off, slip in, build the paint booth inside and around the plane, sand, prime, and paint in two to three days before they realize what I am doing since we are NOT supposed to be painting in the hangars. I have already pre-assembled the whole thing in my driveway and fabricated the plastic covering, filters, fans, lighting, and sealed entrance. Should take about 1/2 day to assemble and seal before starting to paint. I might even sleep with it overnight to make the process as continuous as possible.
If that doesn't work, then I am going to be in DEEP Excrement and looking for another plan.
Bob
From: Bill Schertz <wschertz343(at)gmail.com>
To: kis-list(at)matronics.com
Sent: Thursday, April 7, 2016 9:04 AM
Subject: Re: fairing ?
Bob,
It sounds like you are on track to be able to paint it yourself. I found a painter that came to my hanger and did the painting â very nice job, for $5000. His business model is painting at the customers location. He is located in Indiana, but I know that he actually travels around (did some jobs in AZ). You might give him a call on a long shot if you run into obstacles in painting it yourself.
Rick Billbe
Covington, IN 47932
765-585-3263
765-585-5118
| | - The Matronics KIS-List Email Forum - | | | Use the List Feature Navigator to browse the many List utilities available such as the Email Subscriptions page, Archive Search & Download, 7-Day Browse, Chat, FAQ, Photoshare, and much more:
http://www.matronics.com/Navigator?KIS-List |
|
|
|
| Back to top |
|
|
wschertz343(at)gmail.com
Guest
|
| Posted: Thu Apr 07, 2016 10:41 am Post subject: fairing ? |
|
|
Bob,
Attached are two photos. The one with no one in it is from 2011 when I did my first âcross countryâ from ARR to Rockford for a pancake breakfast. Someone at the airport took the photo and posted it to the internet, where I found it.
In 2014 we moved to Lolo, Montana with the airplane based at Stevensville, MT. Flew it out here with a friend in October of 2014. Haven't been flying enough, getting hard to do the maintenance with old bone/joints.
Bill (I will be 76 end of MAY)
From: Robert Reed (robertr237(at)att.net)
Sent: Thursday, April 07, 2016 10:09 AM
To: kis-list(at)matronics.com (kis-list(at)matronics.com)
Subject: Re: fairing ?
Hey Bill, long time no hear....glad you are still around.
How is your plane doing these days? About time you took a trip down Texas way.
Thanks for the contact name and number, if I can't get things worked out I will give him a call. I intend to try and paint my fuselage in the hangar but unlike your hangar mine is an open walled (above 8 ft.) T-hangar that doesn't even have enough power available to drive a decent portable compressor. I am planning on taking a week off, slip in, build the paint booth inside and around the plane, sand, prime, and paint in two to three days before they realize what I am doing since we are NOT supposed to be painting in the hangars. I have already pre-assembled the whole thing in my driveway and fabricated the plastic covering, filters, fans, lighting, and sealed entrance. Should take about 1/2 day to assemble and seal before starting to paint. I might even sleep with it overnight to make the process as continuous as possible.
If that doesn't work, then I am going to be in DEEP Excrement and looking for another plan.
Bob
From: Bill Schertz <wschertz343(at)gmail.com>
To: kis-list(at)matronics.com
Sent: Thursday, April 7, 2016 9:04 AM
Subject: Re: fairing ?
Bob,
It sounds like you are on track to be able to paint it yourself. I found a painter that came to my hanger and did the painting â very nice job, for $5000. His business model is painting at the customers location. He is located in Indiana, but I know that he actually travels around (did some jobs in AZ). You might give him a call on a long shot if you run into obstacles in painting it yourself.
Rick Billbe
Covington, IN 47932
765-585-3263
765-585-5118
| | - The Matronics KIS-List Email Forum - | | | Use the List Feature Navigator to browse the many List utilities available such as the Email Subscriptions page, Archive Search & Download, 7-Day Browse, Chat, FAQ, Photoshare, and much more:
http://www.matronics.com/Navigator?KIS-List |
|
| Description: |
|
| Filesize: |
2.43 MB |
| Viewed: |
11915 Time(s) |
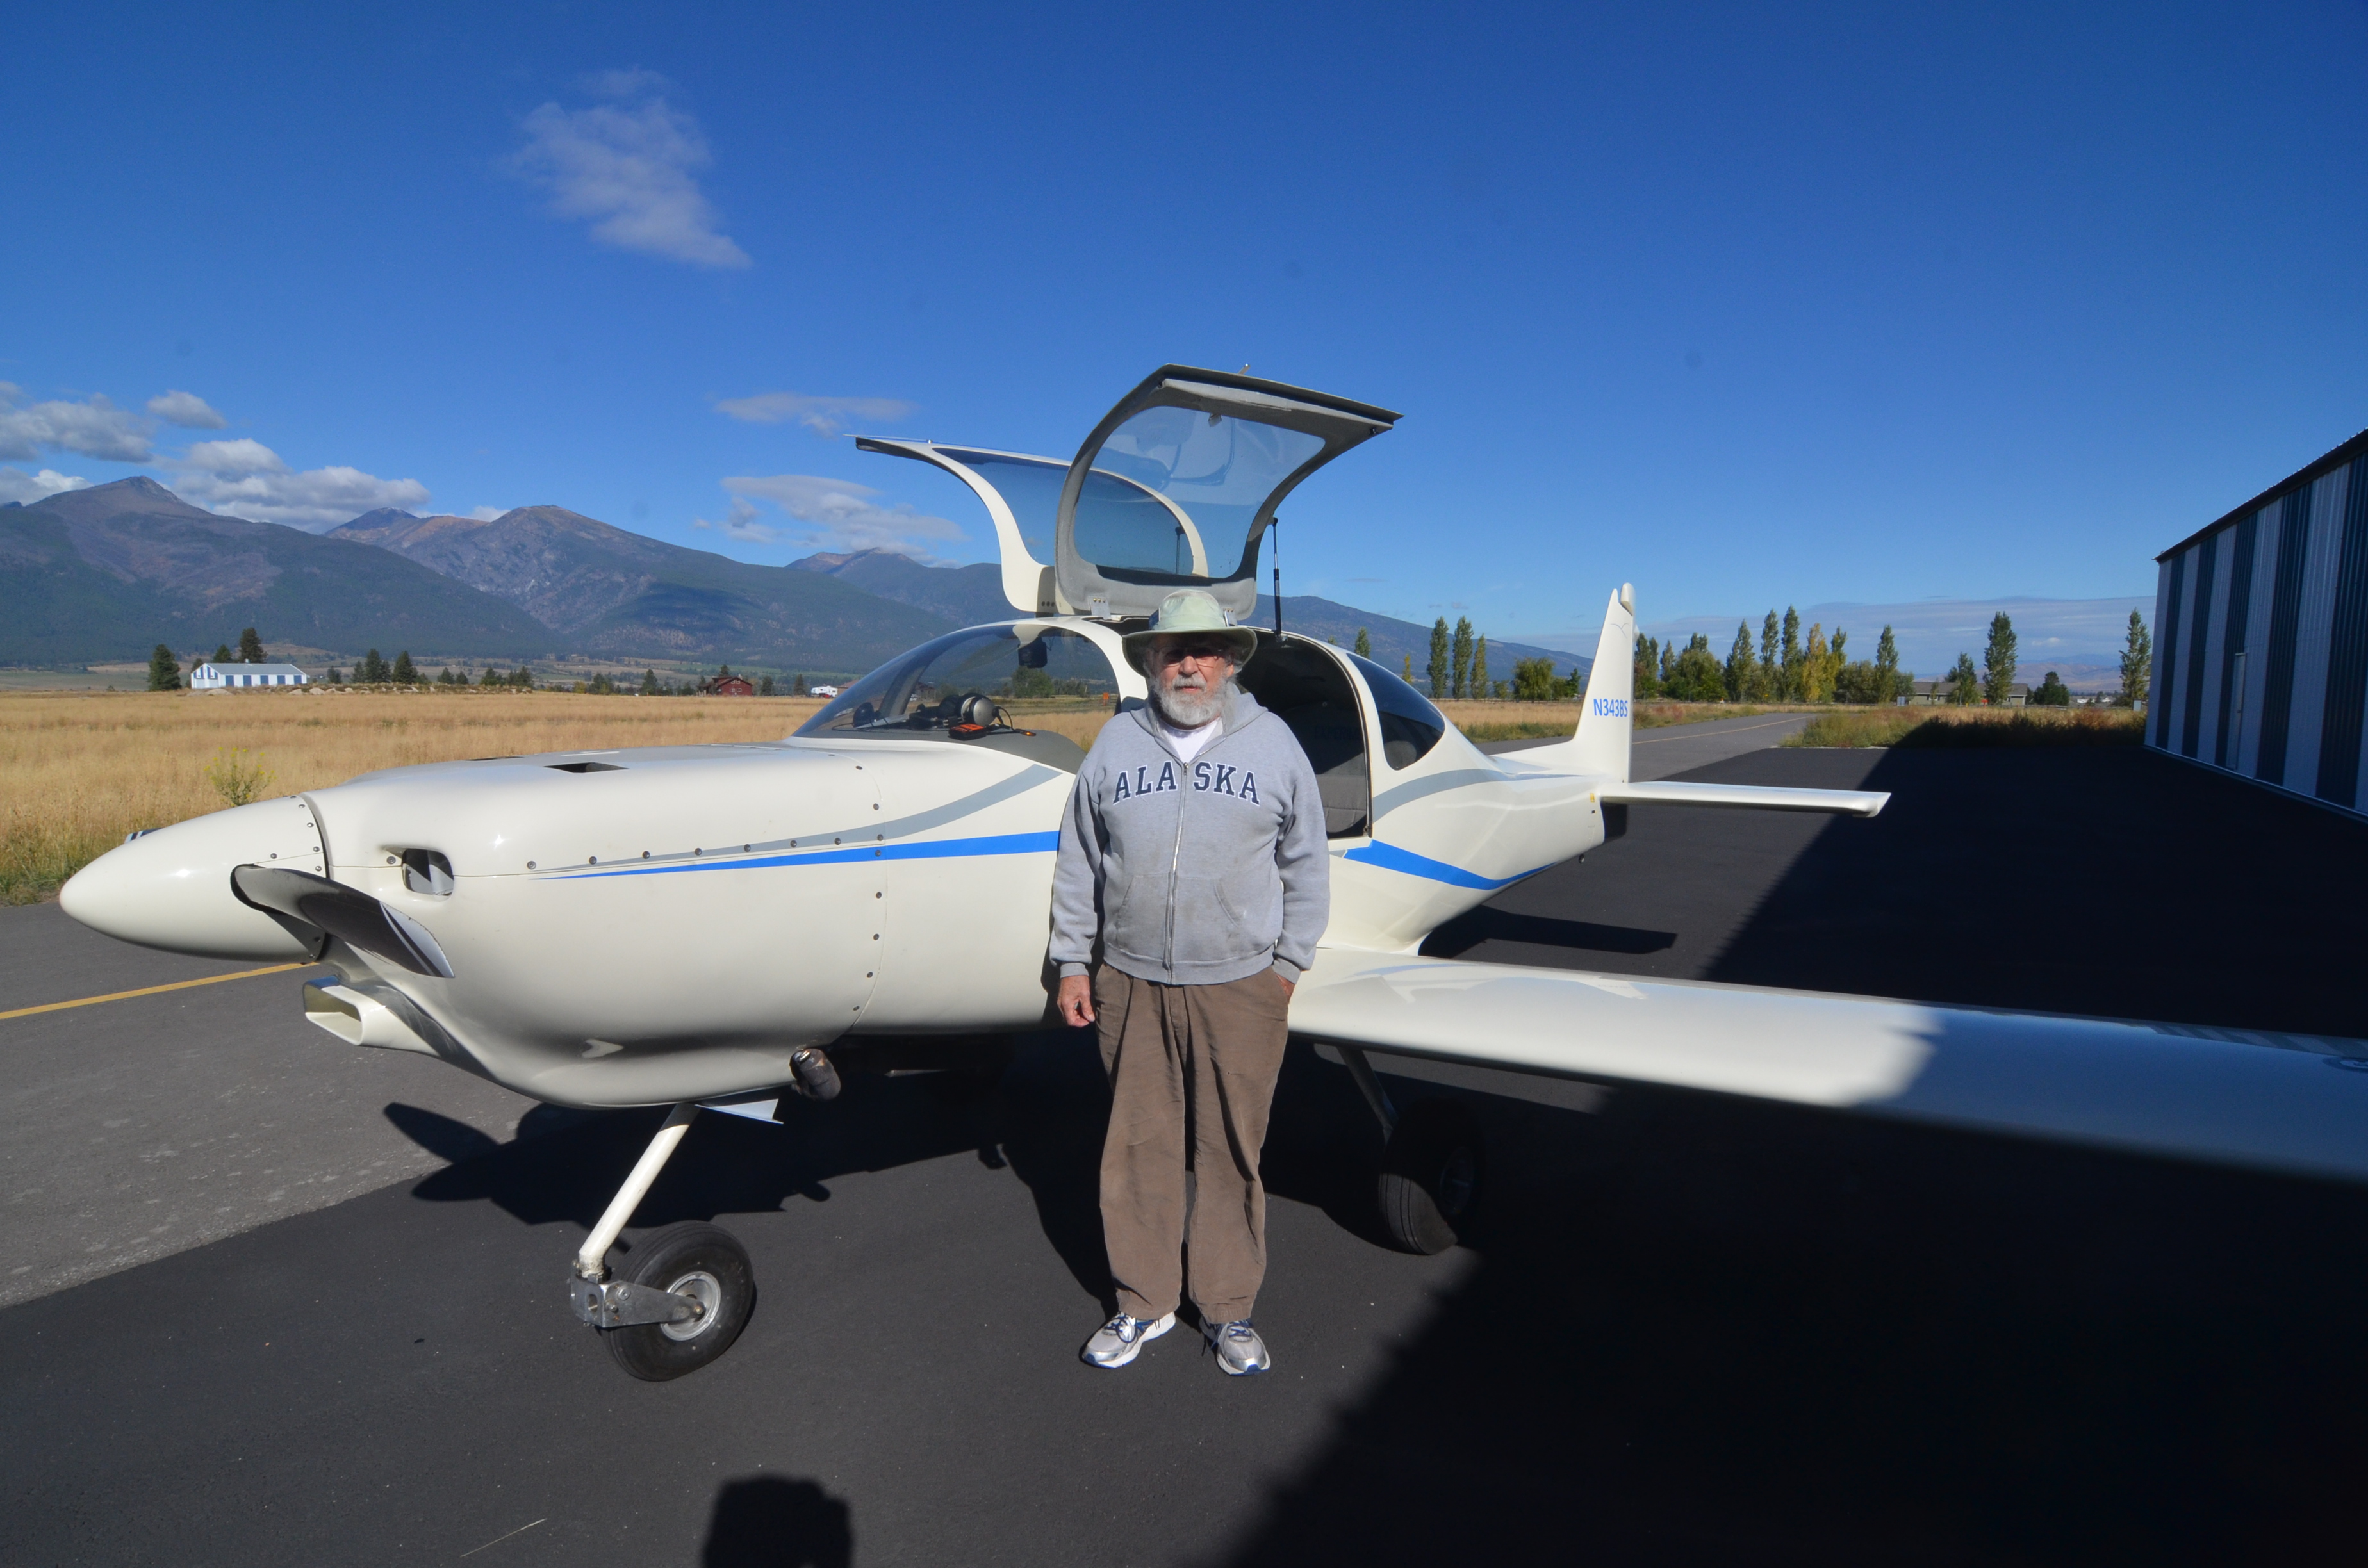
|
| Description: |
|
| Filesize: |
189.99 KB |
| Viewed: |
11915 Time(s) |
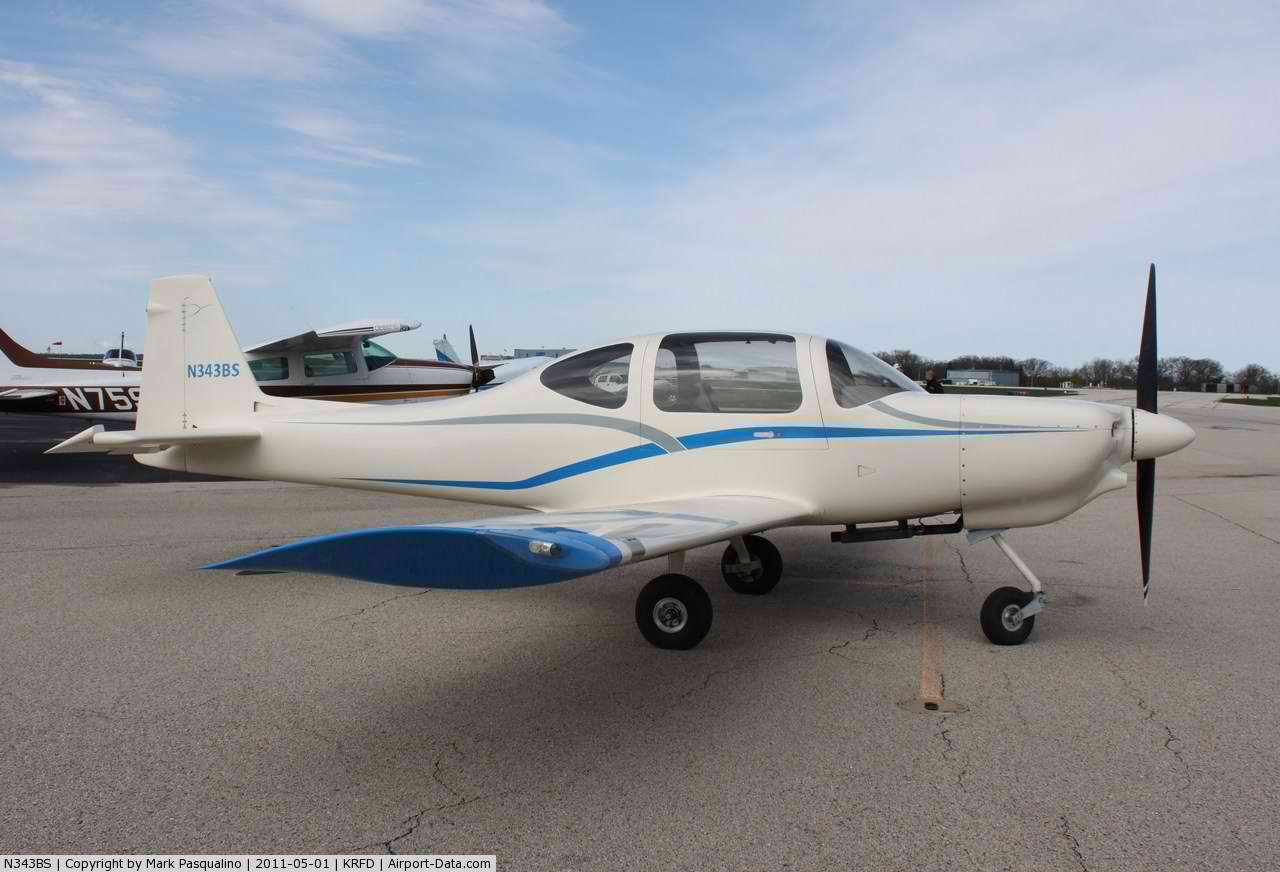
|
|
|
| Back to top |
|
|
|
|
You cannot post new topics in this forum
You cannot reply to topics in this forum
You cannot edit your posts in this forum
You cannot delete your posts in this forum
You cannot vote in polls in this forum
You cannot attach files in this forum
You can download files in this forum
|
Powered by phpBB © 2001, 2005 phpBB Group
|

